DivingStation function description
Description
DivingStation is the integrated PC software used to operate our devices.
By connecting the included dongle to your PC, you can access various device functions.
Supported OS
This software is for Windows only.
Operation on other operating systems is not guaranteed. Please note this beforehand.
Launch DivingStation and connect the included dongle to your PC.
After connecting the dongle, a panel labeled ContactGlove2 will appear. Select the panel to open the device's main screen.
(Main Device Screen)
This is the basic screen where you can configure various device settings.
- The Hand Tracking tab is open by default.
| Paired | Unpaired |
|---|---|
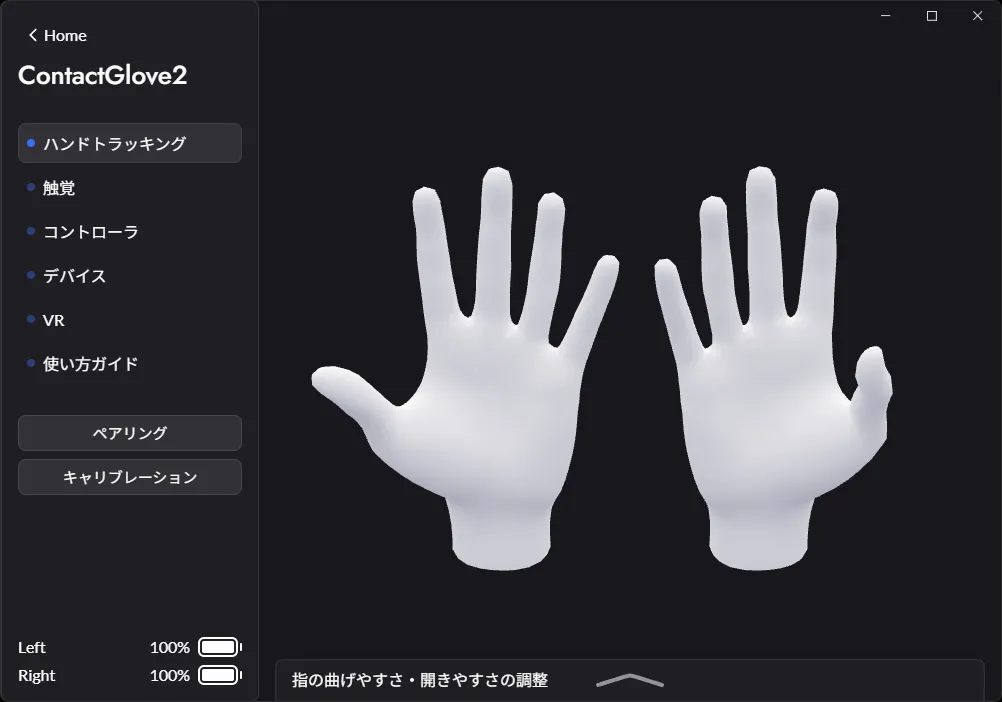 | 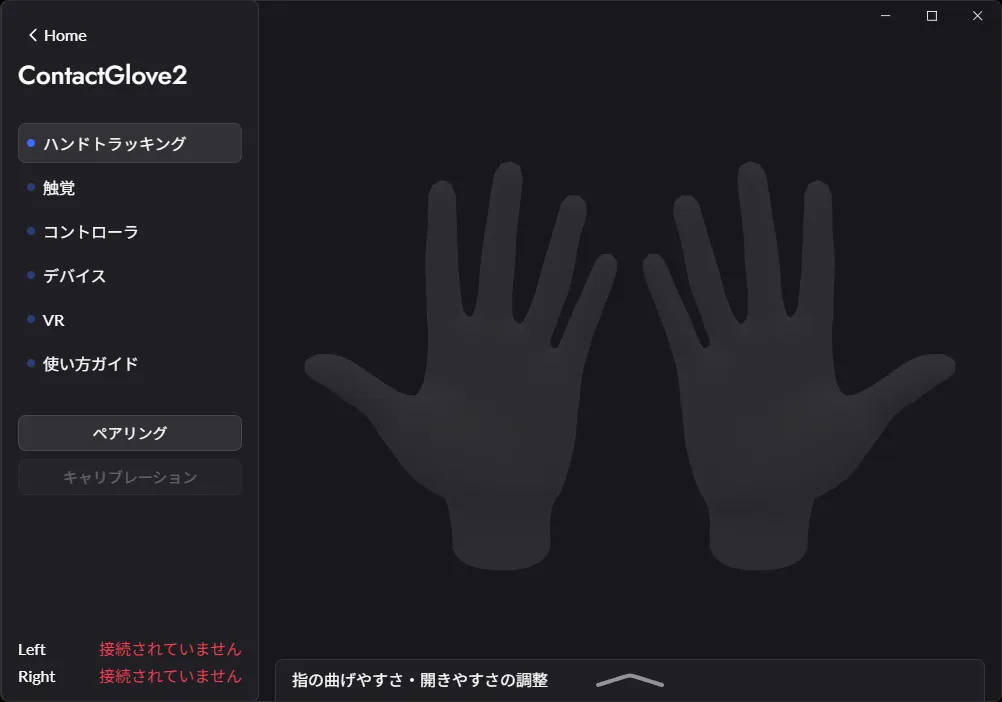 |
[Function List]
| Status | Pairing & Calibration |
|---|---|
 |  |
| No. | Function | Description |
|---|---|---|
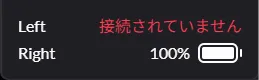
| 1 | Status Display (Battery Level) | Displays the connection status or battery level of the left/right devices in the bottom left of the screen. |
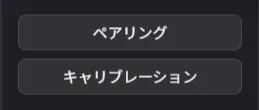
| 2 | Pairing (Button) | Allows you to pair the device with the dongle. |
| 3 | Calibration (Button) | Performs calibration related to the device. |
[Detailed Explanation]
1: Status Display (Battery Level) Function
Displays the connection status or battery level of the left/right devices in the bottom left of the screen.
| Display | Content |
|---|---|
| XX% | Connected normally: Current device battery level |
| Not Connected | Not connected |
| Connecting... | Establishing connection |
| -- % | Connected normally: Reading battery level |
2: Pairing Function (Button)
Pressing the button allows you to pair the device with the dongle.
| Pairing Complete | Pairing Incomplete |
|---|---|
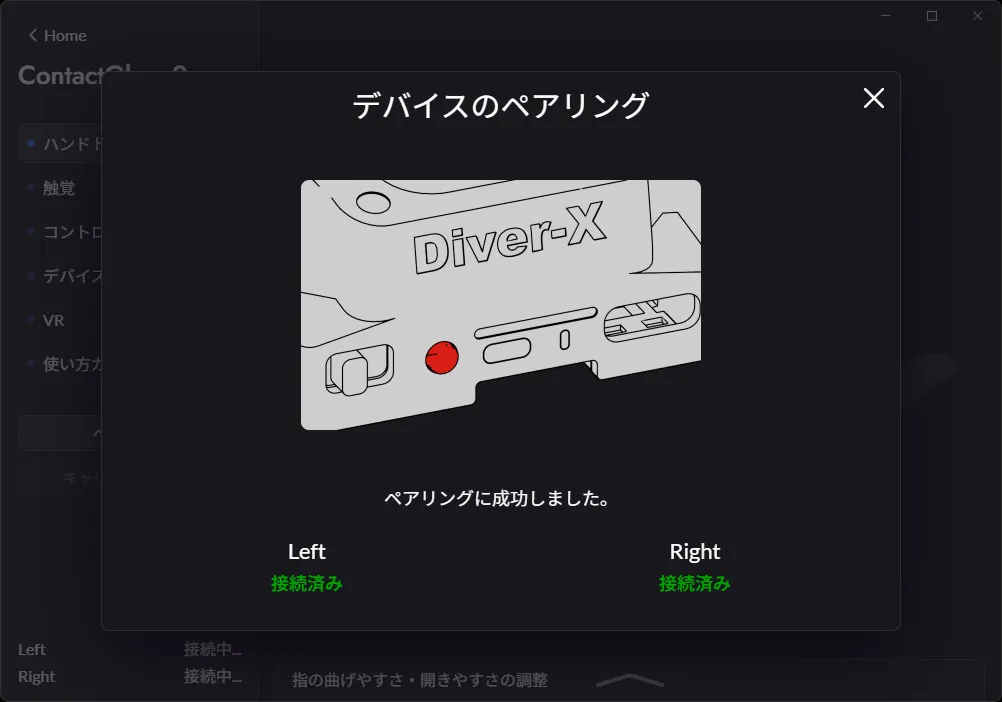 | 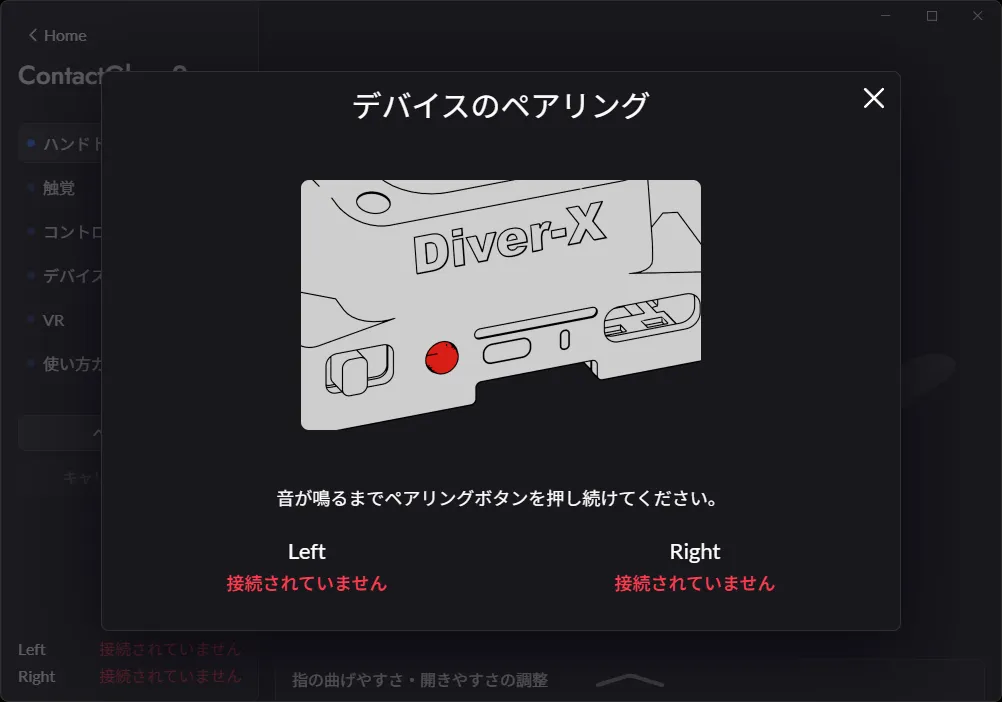 |
*When pairing, the Dongle communication channel (ch) is initialized to 1.
| Content | Method |
|---|---|
| Pairing | Turn on the device and press and hold the pairing button. |
| Initialize Pairing | (While device is paired/connected) Go to the Device tab > Dongle, change the ch to something other than 1, and then press the pairing button. |
3: Calibration Function (Button)
Pressing the button allows you to perform calibration related to the device. Use the Start button to begin calibration.
| Item | Screen | Use/Target | Calibration | Options |
|---|---|---|---|---|
| Finger | 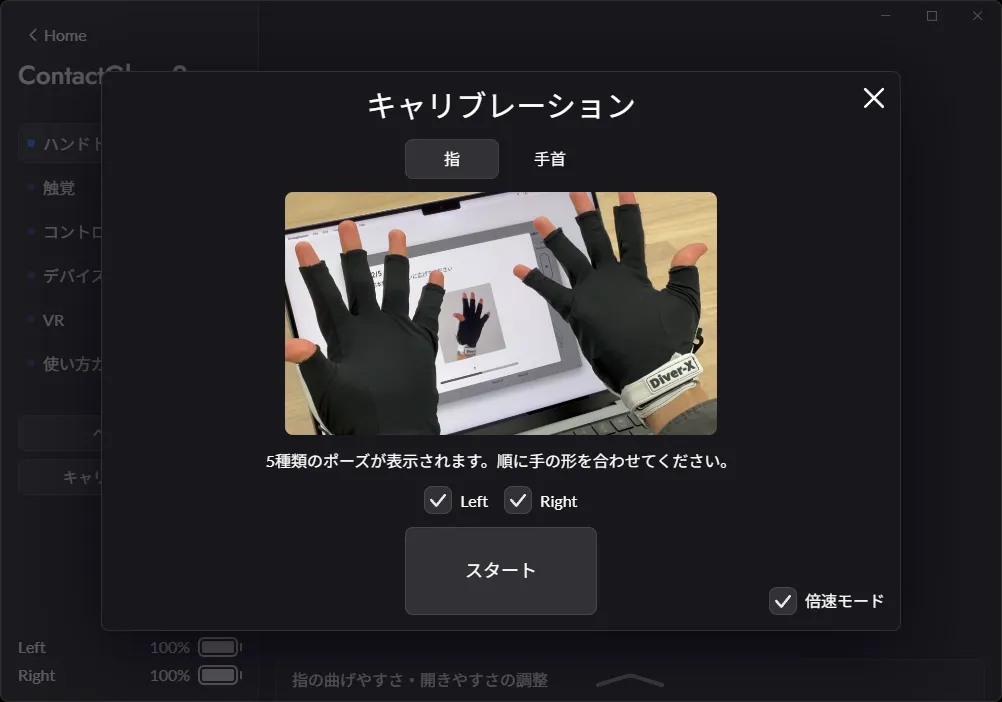 | Hand Tracking | Finger Bend/Spread | Left/Right : Select the target for calibration. Double Speed Mode : Enable to shorten each calibration phase time. |
| Wrist | 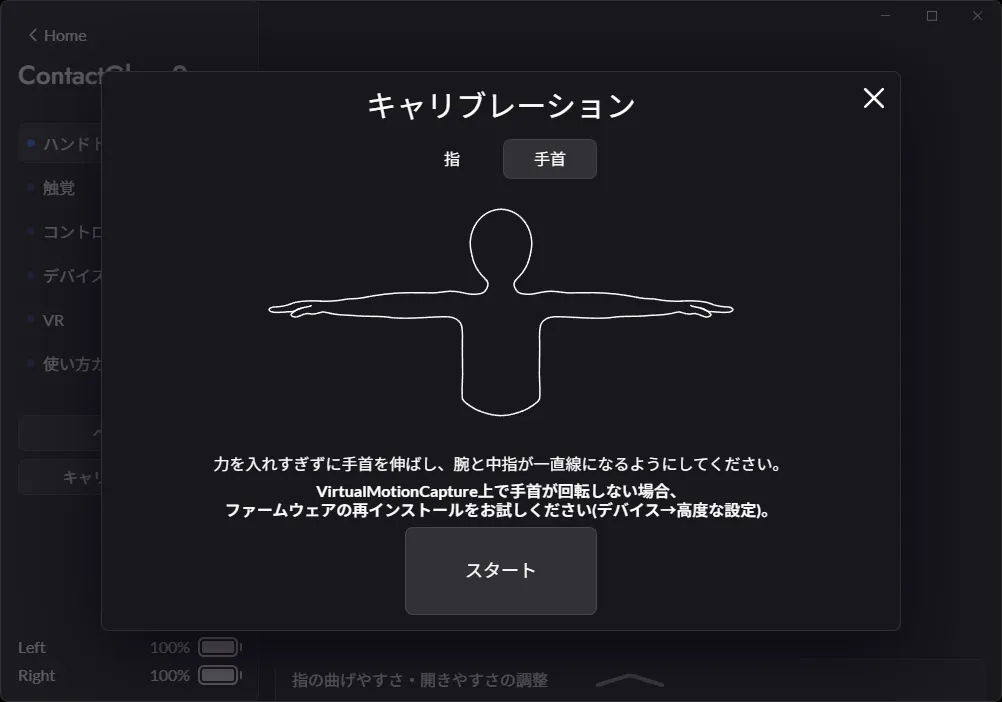 | VirtualMotionCapture Integration | Wrist Posture (Rotation) | Performs tracking calibration for VirtualMotionCapture. (= Calibrates the Glove's posture (wrist posture)). |
[Tab] Hand Tracking
Visualizes hand tracking by the device.
You can preview the hand tracking results from various angles.
[Function List]
| No. | Function | Description |
|---|---|---|
| 1 | Visualizer | Visualizes hand tracking using a white 3D hand model. |
| 2 | Adjustment Tab | Allows for fine-tuning of hand tracking. |
[Detailed Explanation]
1: Visualizer Function
Visualizes the state of hand tracking. The hand model moves in response to bending and spreading of each joint.
*This is strictly a visualization; movement may differ slightly between the visualizer model and SteamVR hand tracking (Skeletal Input).
| Function | Description |
|---|---|
| Visualizer | Visualizes hand tracking using a white 3D hand model. |
| Visual Rotation | 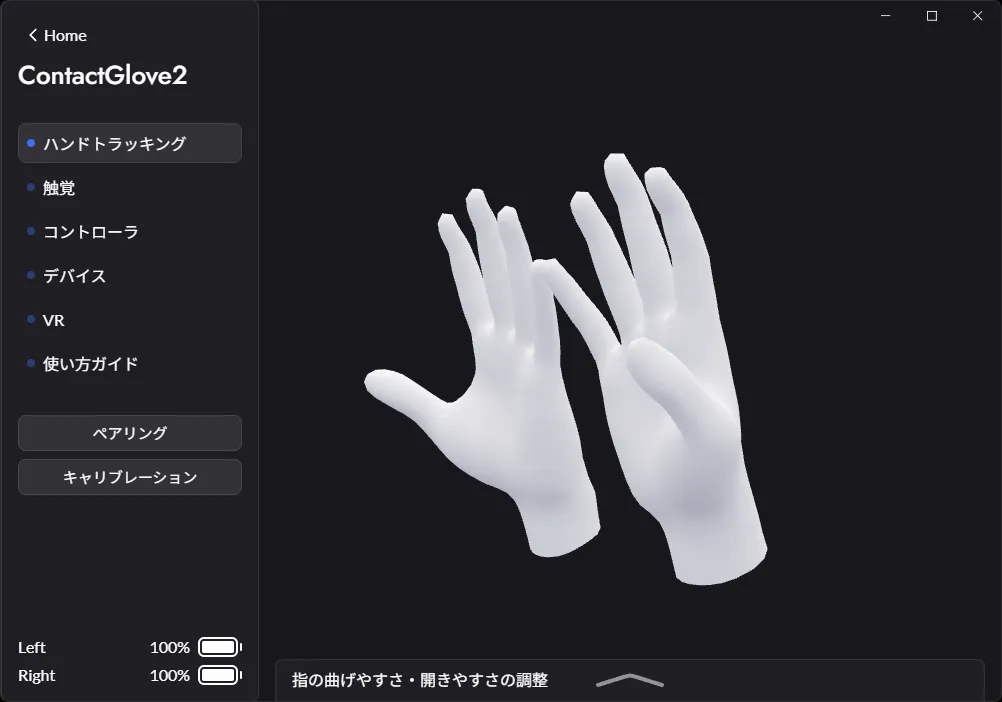 Left-click with the mouse cursor to rotate the hand model. (Switching tabs resets it to the default posture.) |
2: Adjustment Tab
Allows for fine-tuning of hand tracking. Click the tab at the bottom of the visualizer to open it. You can select from three adjustment modes: "Easy", "Detailed (Unified)", and "Detailed (Individual)".
In all modes, the current setting value is displayed numerically while dragging the gauge.
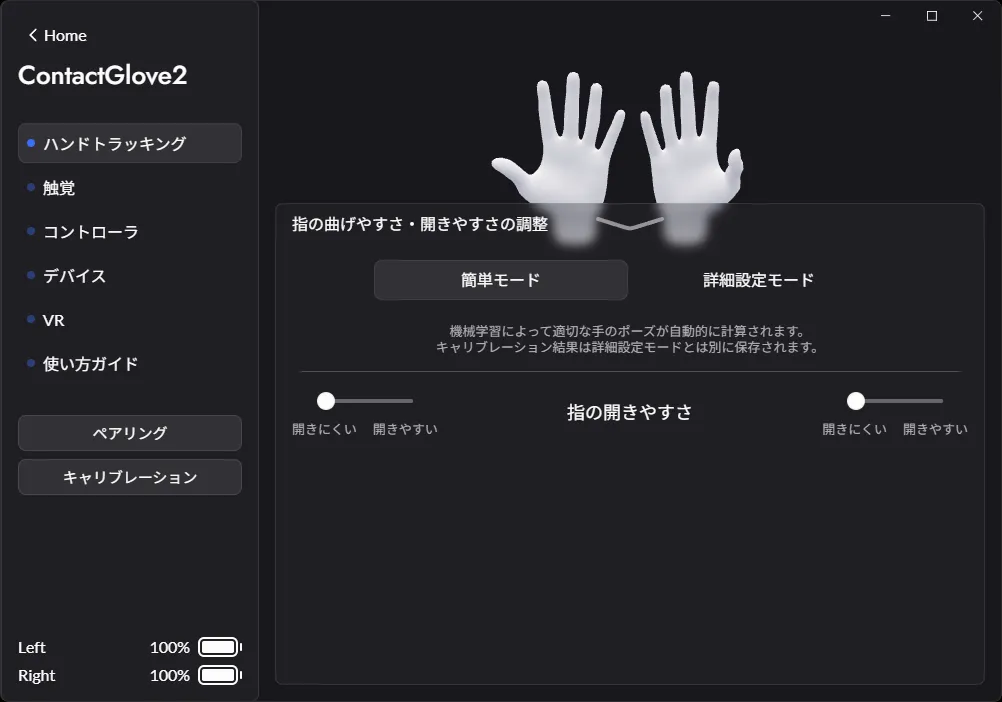
| Mode | Image | Description |
|---|---|---|
| Easy | | Finger Openness Adjusts the ease of opening for all fingers uniformly. Use this if fingers are difficult to open or difficult to close. |
| Detailed (Unified) | 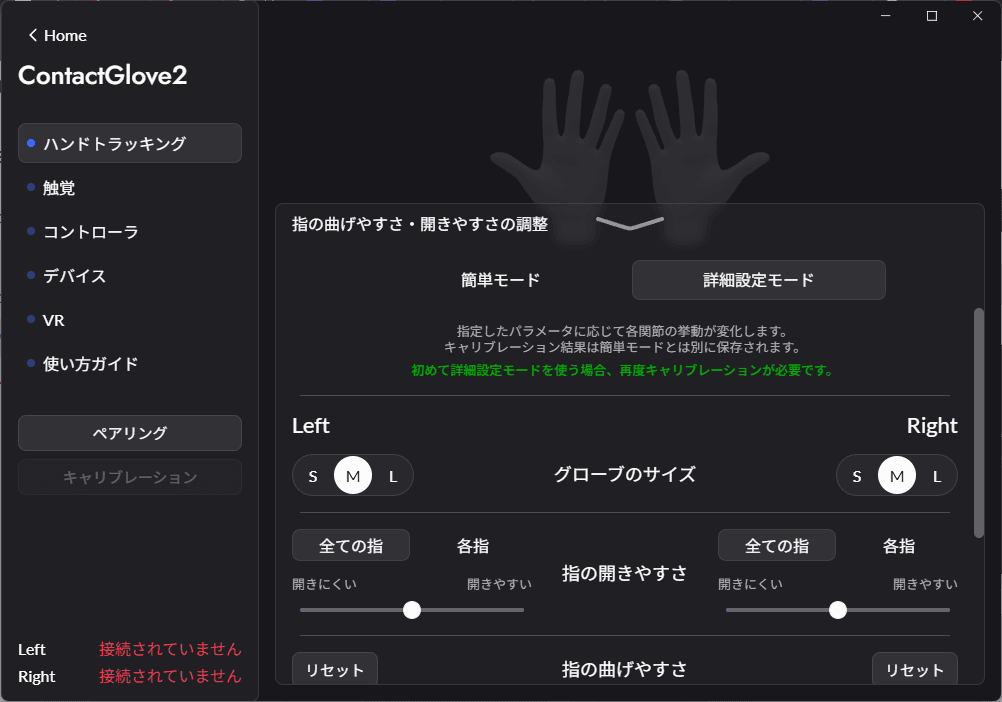 | Joint bend adjustment + Openness adjustment for all fingers ・Bend amount: Individually adjustable per finger joint. ・Openness: Adjustable for all fingers at once. Use this if it is difficult to make specific hand shapes. |
| Detailed (Individual) | 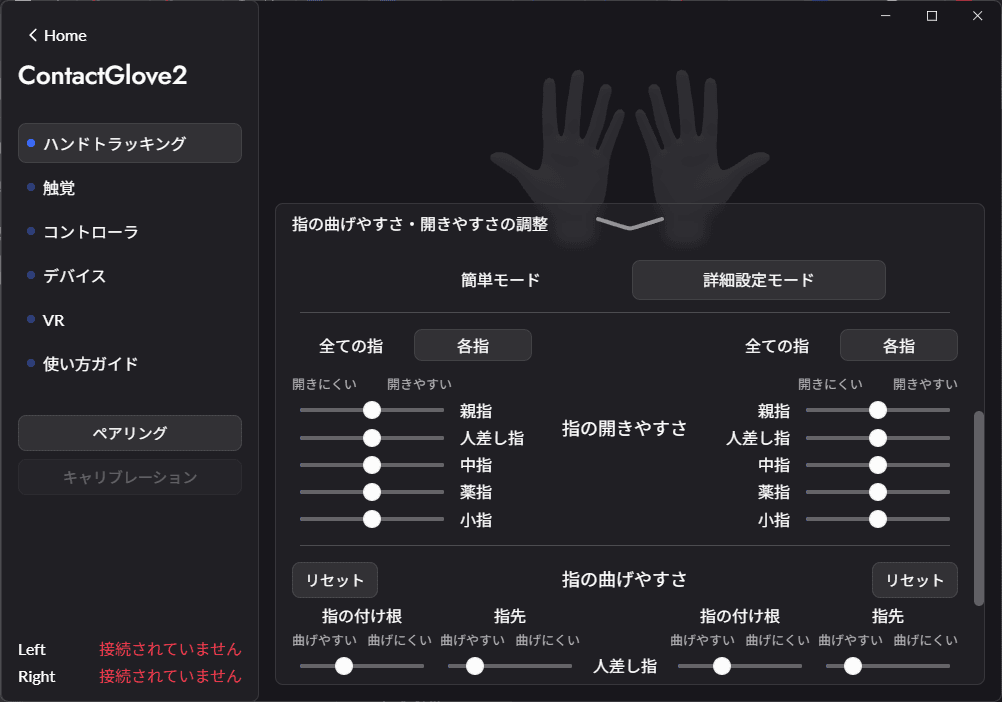 | Joint bend adjustment + Openness adjustment per finger ・Bend amount: Individually adjustable per finger joint. ・Openness: Individually adjustable per finger. Use this for thorough tuning, such as when movement is only concerning for a specific finger. |
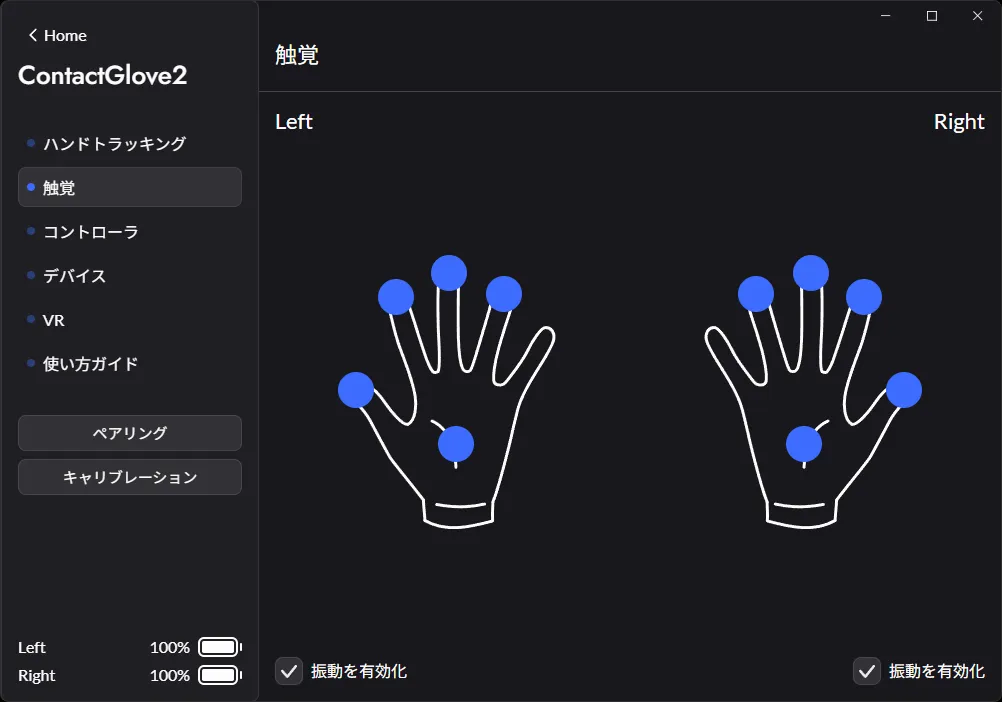
[Tab] Haptics
Tests the device's haptic (vibration) function.
You can also enable/disable the vibration function here.
[Function List]
| No. | Function | Image | Description |
|---|---|---|---|
| 1 | Device Vibration Button | 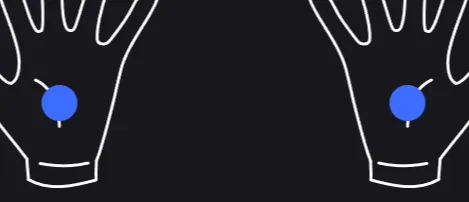 | Tests the device vibration. (Only palm button detection is valid here.) |
| 2 | Enable Vibration |  | Check "Enable Vibration" to activate device vibration (Default: ON). |
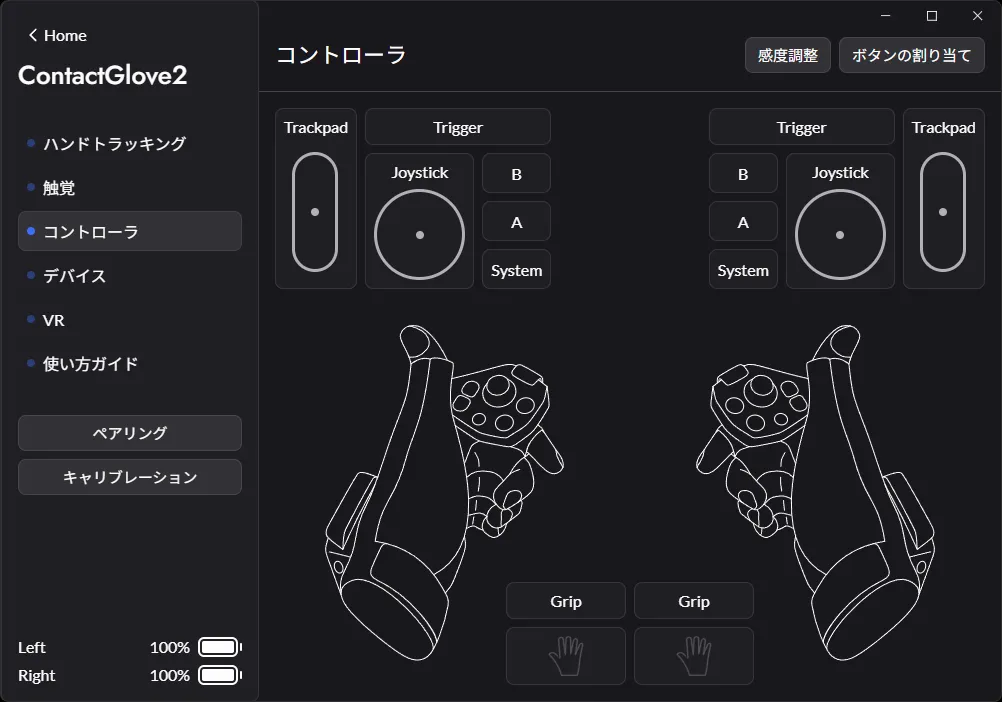
[Tab] Controller
Configures Magnetra2 input operations.
You can also configure emulation inputs via hand tracking here.
[Function List]
| No. | Function | Image | Description |
|---|---|---|---|
| 1 | Main Screen | | Visualizes various input states of the device, including Magnetra2. |
| 2 | Sensitivity Adjustment (Tab) | 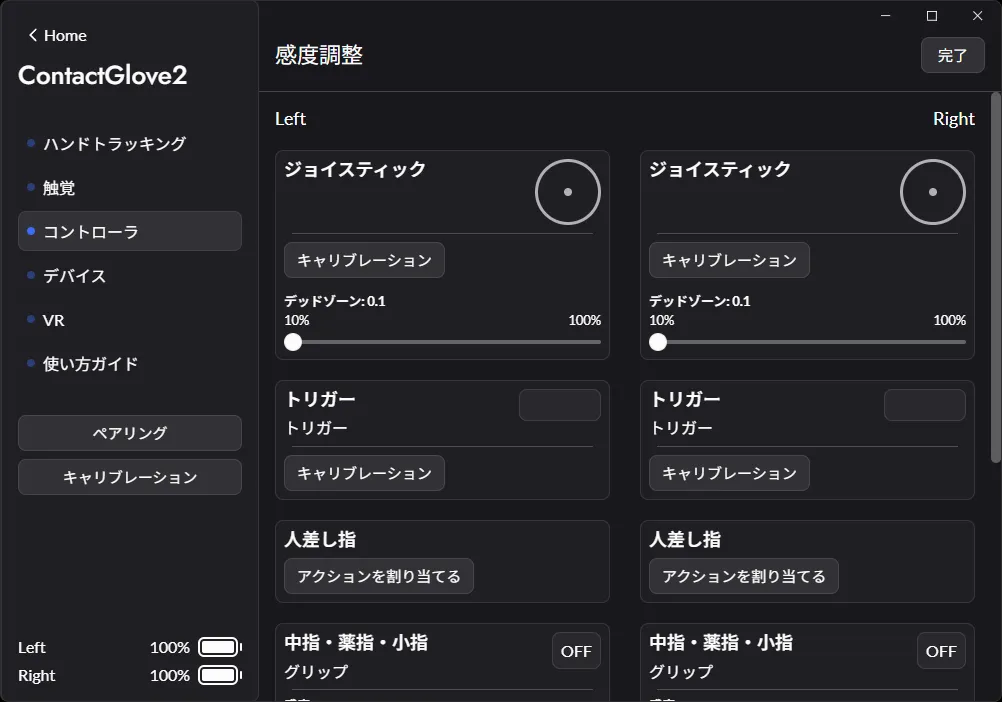 | Allows for calibration and sensitivity adjustment of analog inputs. |
| 3 | Button Assignment (Tab) | 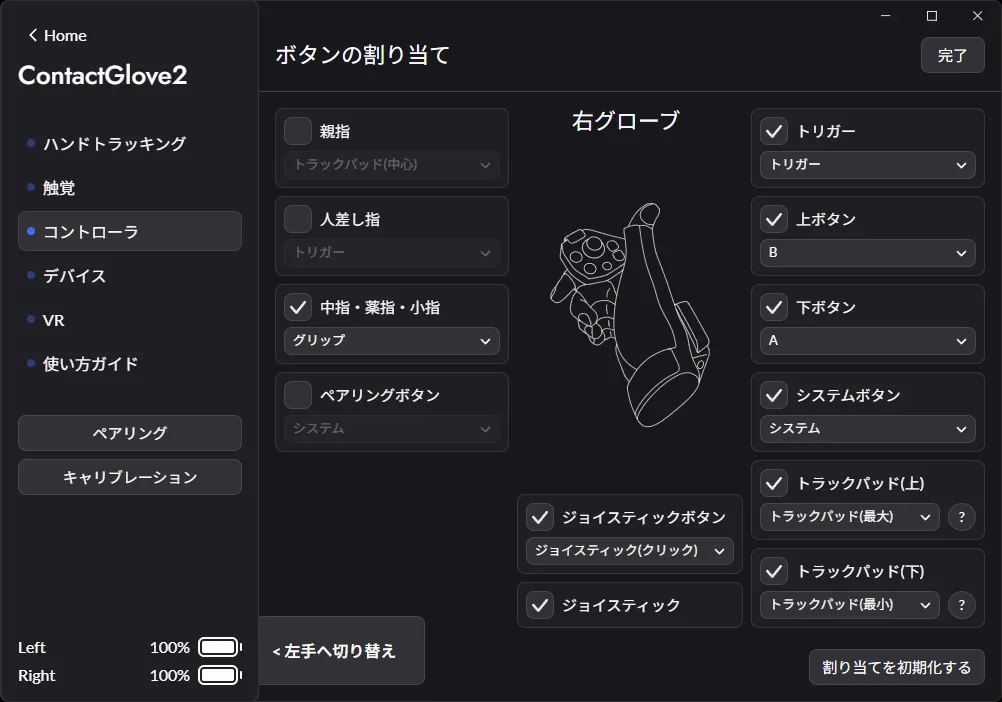 | Customize assignments between Magnetra2 buttons and VR controller inputs. |
[Detailed Explanation]
1: Main Screen
Visualizes the controller input state with colors.
| Function | Image | Description |
|---|---|---|
| Input Button Position | 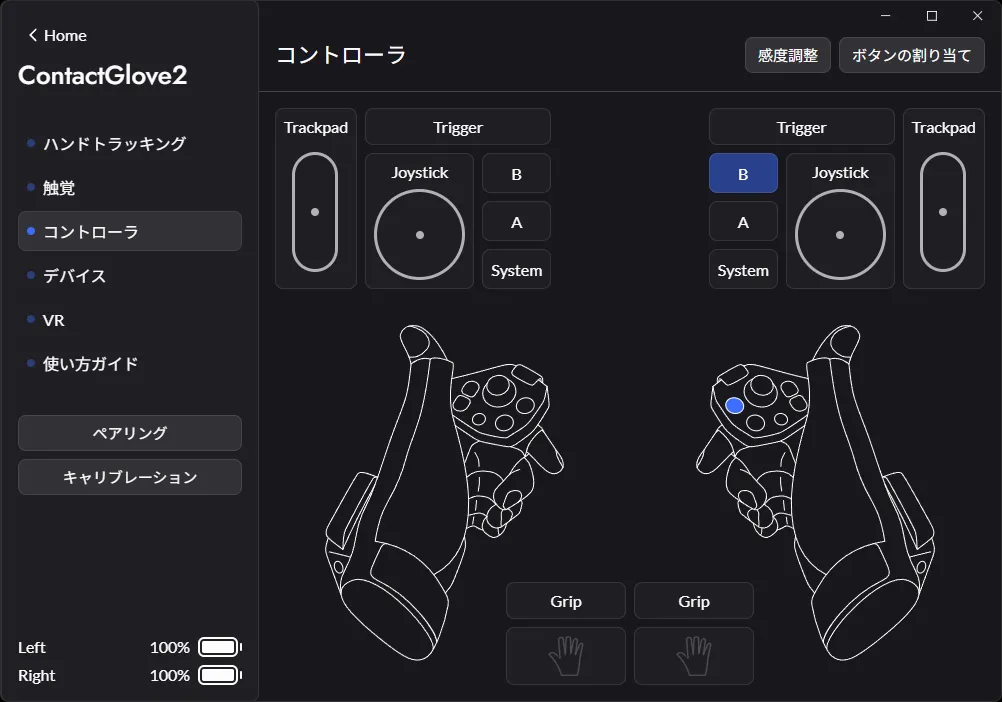 | 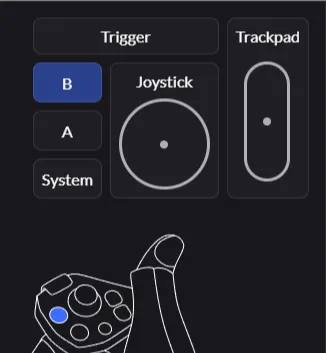 When you hover over the controller input display area, the module currently assigned to that input is highlighted in Blue. |
| Controller Input State | 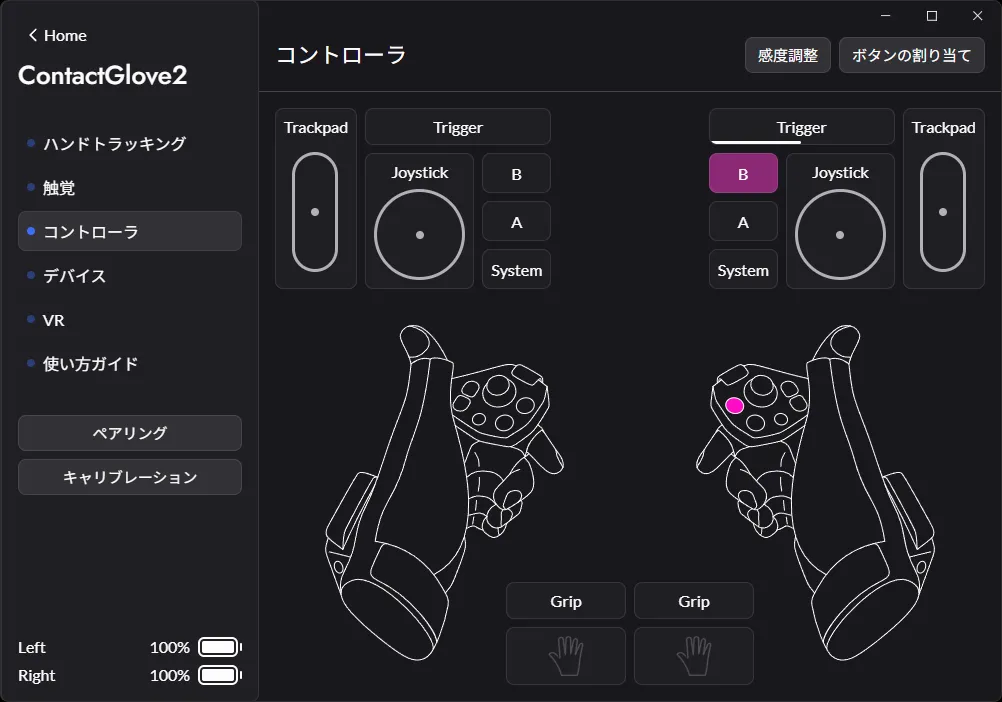 | 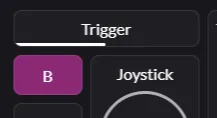 Displays the state of button/analog inputs via white lights/gauges on the controller diagram in the input display area. |
| Button Input State | 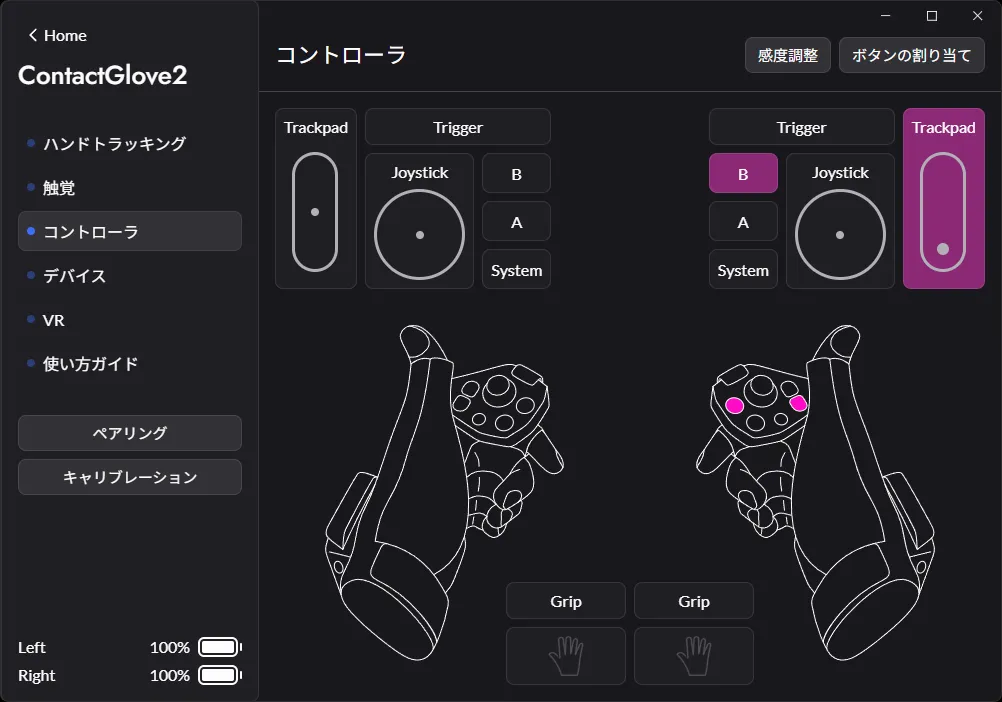 | When a button input or analog input (max value) is performed, the module currently assigned to that input is highlighted in Purple. |
2: Sensitivity Adjustment Tab
Allows calibration and sensitivity settings for various analog inputs.
(The function of each adjustment item changes depending on the function assignment to the input.)
Changes are reflected immediately. Click the Done button in the upper right to return to the main screen.
Important: Joystick and Trigger Calibration
If Trigger or Joystick input is unstable, please perform calibration from this section.
For the Joystick in particular, the dead zone settings are optimized only after performing calibration. If calibration is not set, issues such as being unable to reach maximum input values when tilting the stick to specific angles (often occurring when using Radial Menus/Ex Menus in VRChat) are likely to occur. This phenomenon frequently happens when using default settings. Please ensure you perform calibration at least once.
| Function | Image | Description |
|---|---|---|
| Joystick | 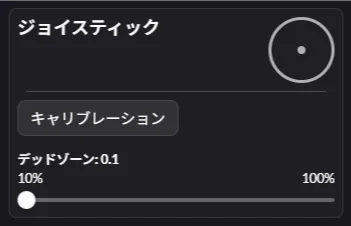 | Adjusts Magnetra2 Joystick input. ・Calibration (Important) ・Dead zone adjustment |
| Trigger | 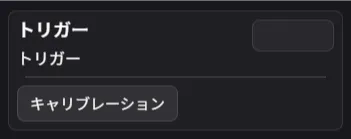 | (When action is assigned) Performs Calibration for Magnetra2's physical trigger input. |
| Index Finger | 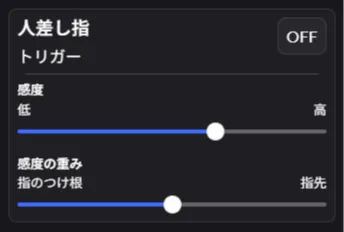 ex) Trigger assigned | (When action is assigned) Performs Sensitivity & Joint Weight Adjustment for emulation input via index finger bending. |
| Middle/Ring/Little | 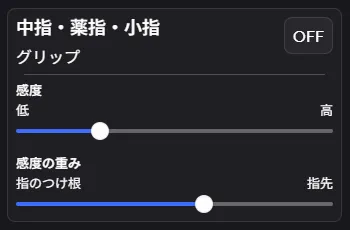 ex) Grip assigned | (When action is assigned) Performs Sensitivity & Joint Weight Adjustment for emulation input via bending of middle, ring, and little fingers. *Grip action is assigned by default. |
| Thumb | 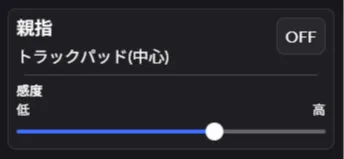 ex) Trackpad (Center) assigned | (When action is assigned) Performs Sensitivity Adjustment for emulation input via thumb bending. |
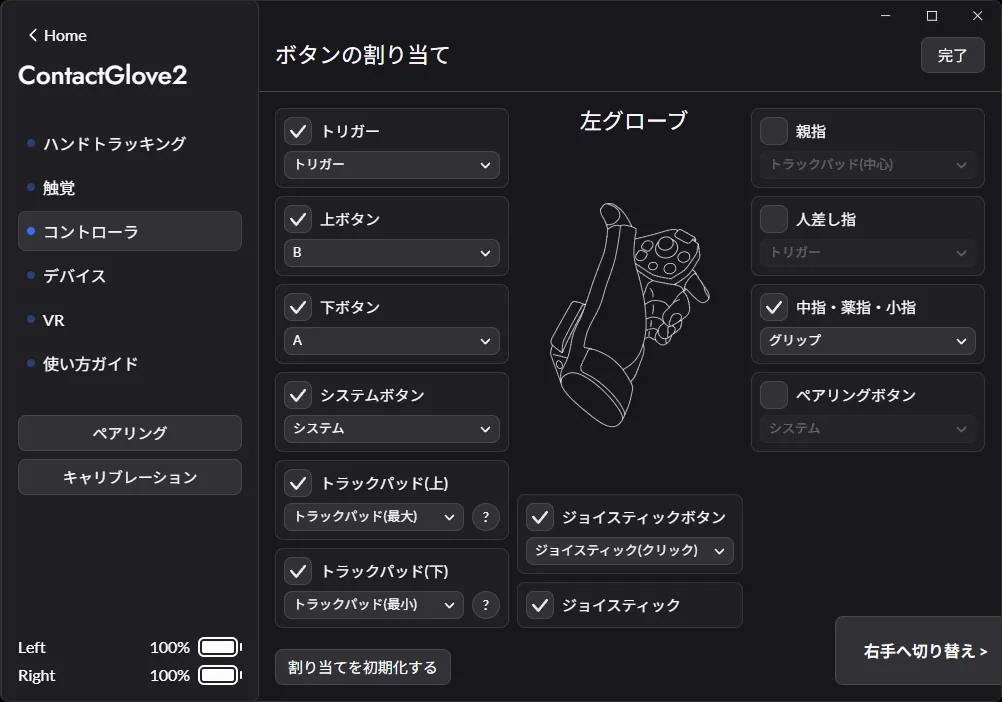
3: Button Assignment Tab
Customize Enable/Disable/Function Assignments for left/right physical and VR inputs.
Changes are reflected immediately. Click the Done button to return to the main screen.
| Left Hand | Right Hand |
|---|---|
 | |
| Function | Image | Description |
|---|---|---|
| Input Button Position | 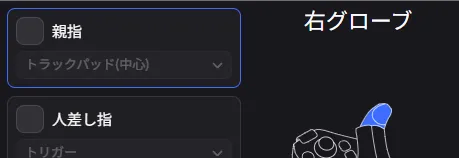 | When you hover over the controller input display area, the module currently assigned to that input is highlighted in Blue. |
| Enable Button Input | 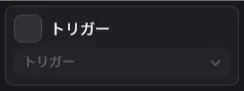 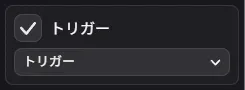 | Enable or disable physical input. |
| Assign Function | 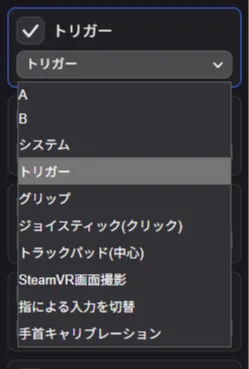 (ex Magnetra2 Trigger | Sets the input function assigned to physical input. (Assignable functions vary by input.) |
| Initialize Assignment |  | Resets function assignments to default. |
| Switch Left/Right |   | Switches between left and right hand settings screens. |
[Tab] Device
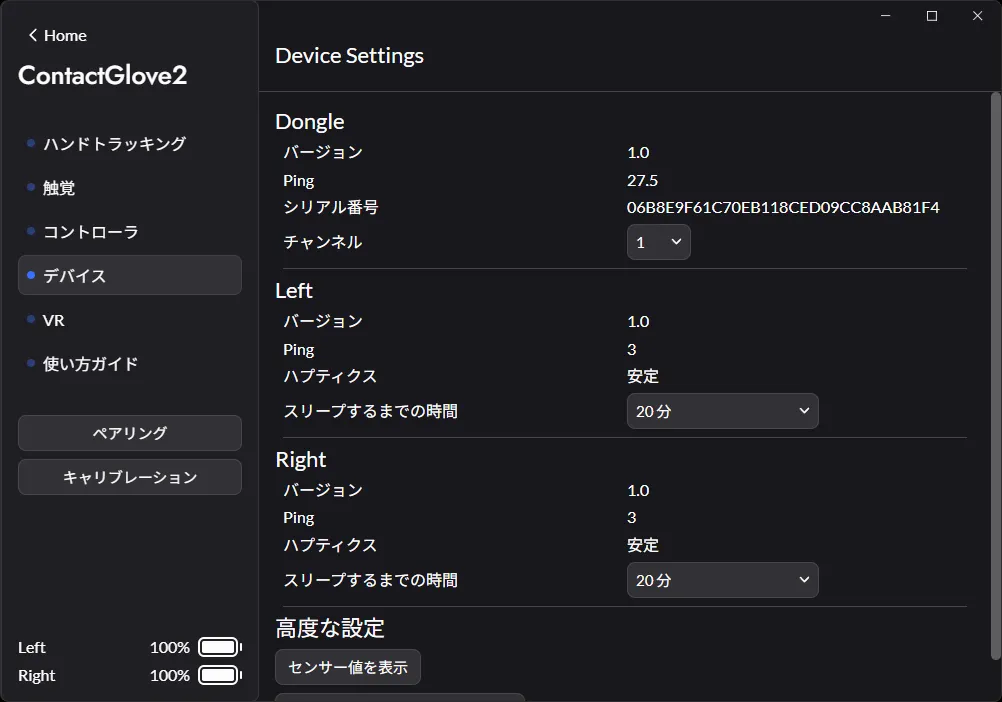
Configure device FW version, communication status, and sleep settings.
You can also set controller priority and reinstall FW here.
[Function List]
| No. | Item | Description |
|---|---|---|
| 1 | Dongle | Monitor dongle status and set device wireless communication channels. |
| 2 | Left/Right (Glove) | Monitor glove status and set sleep timer. |
| 3 | Advanced Settings | Change advanced device settings. |
[Detailed Explanation]
1: Dongle
| Function | Description | Note |
|---|---|---|
| Version | Displays firmware version. | Glove and Dongle firmware versions may not match. |
| Ping | Displays Dongle Ping (communication time). | Lower values indicate faster data communication. Large fluctuations indicate poor communication quality. |
| Serial Number | Displays serial number. | |
| Channel | Set/Change device communication ch (1~13). | Use this to avoid interference when using multiple devices. Changing this may improve connection if interference with other wireless devices (2.4GHz band) is suspected. |
2: Left / Right (Glove)
| Function | Description | Note |
|---|---|---|
| Version | Displays firmware version. | Glove and Dongle firmware versions may not match. |
| Ping | Displays Ping (communication time). | Lower values indicate faster data communication. Large fluctuations indicate poor communication quality. By design, the Glove's Ping will be lower than the Dongle's. |
| Time until Sleep | Set the time until the device sleeps when idle. | Options: Disabled / 5 min / 10 min / 20 min / 30 min |
3: Advanced Settings
| Function | Description | Note |
|---|---|---|
| Use as main controller (Default: ON) | Turn ON if using this device as main. | Intended for using the device as a controller in SteamVR or VirtualMotionCapture. If already the main controller, this setting will not appear. |
| Reinstall Firmware | Reinstall Dongle/Device firmware. | A notification will appear in the Device tab if an update is required. |
[Tab] VR
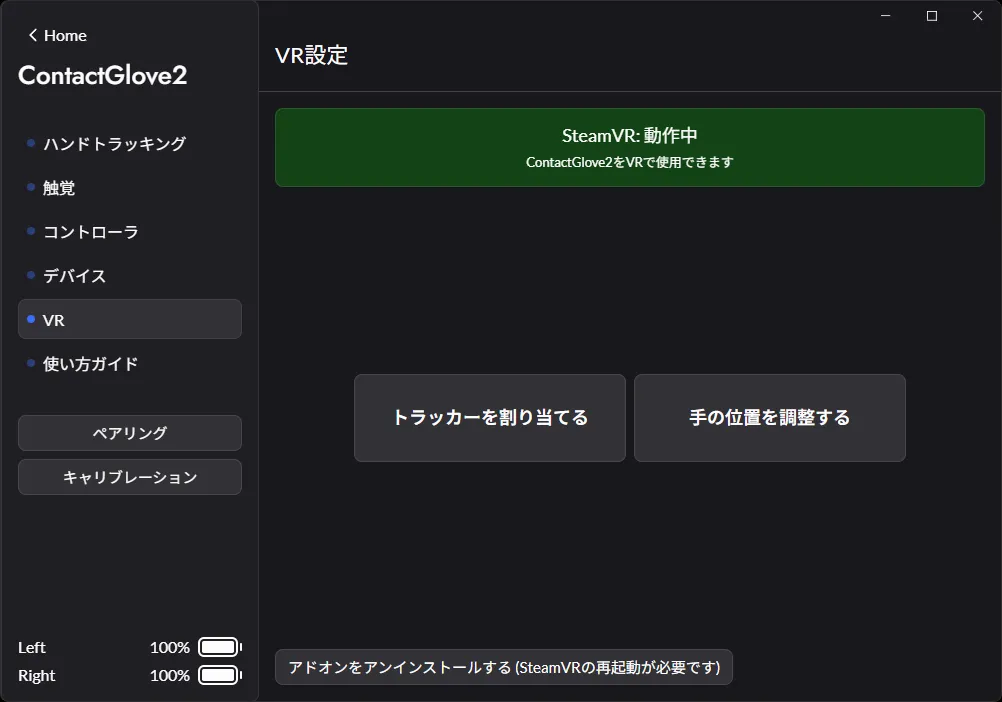
Enable/Disable SteamVR driver and configure position tracking trackers when SteamVR is running.
1: VR Settings
Enable SteamVR driver / Assign & Adjust Position of Trackers for Glove.
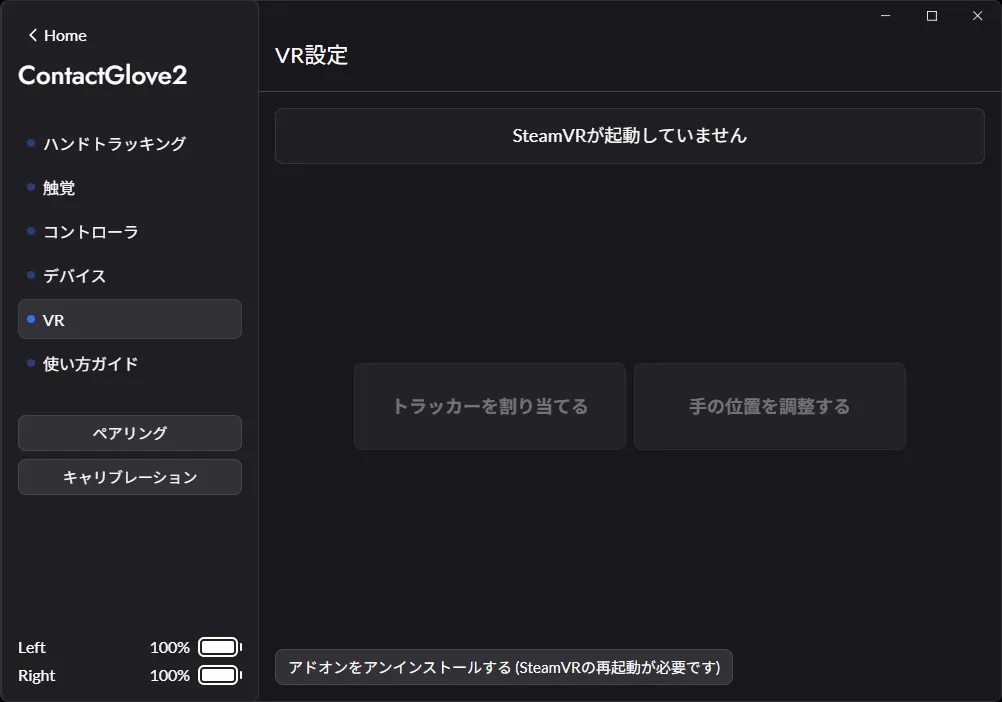
| SteamVR Not Running | SteamVR Running |
|---|---|
 | |
VR Settings: Assign Tracker
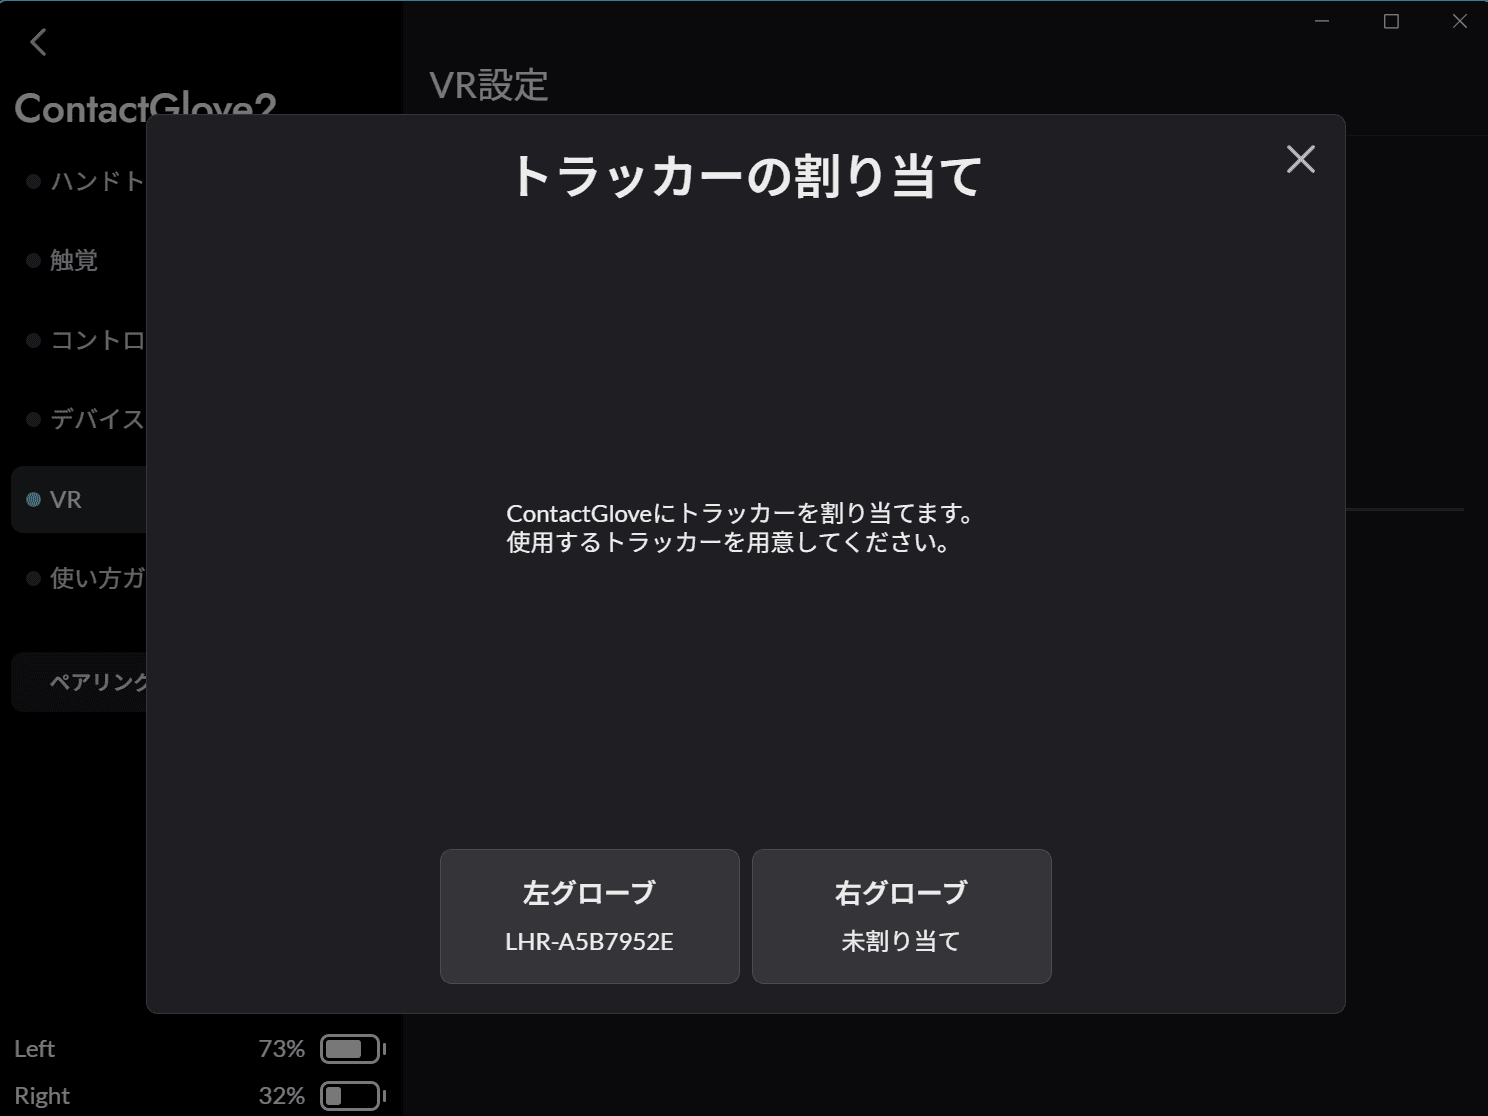
Assigns trackers used for glove positional tracking.
First, turn on the device, start SteamVR, and ensure the trackers you intend to use are recognized by SteamVR.
| Order | Description |
|---|---|
| Auto Assignment | (Recommended) Easily assign settings by shaking the tracker. |
| Manual Assignment | Select from a list of active trackers to assign manually. |
VR Settings: Assign Tracker | [Auto Assignment] (Recommended)
| Order | Image | Description |
|---|---|---|
| 1 | | Pressing the Left/Right Glove button starts the tracker assignment phase. [Assigned] : Displays tracker device serial. [Unassigned] : Displays "Unassigned". |
| 2 | 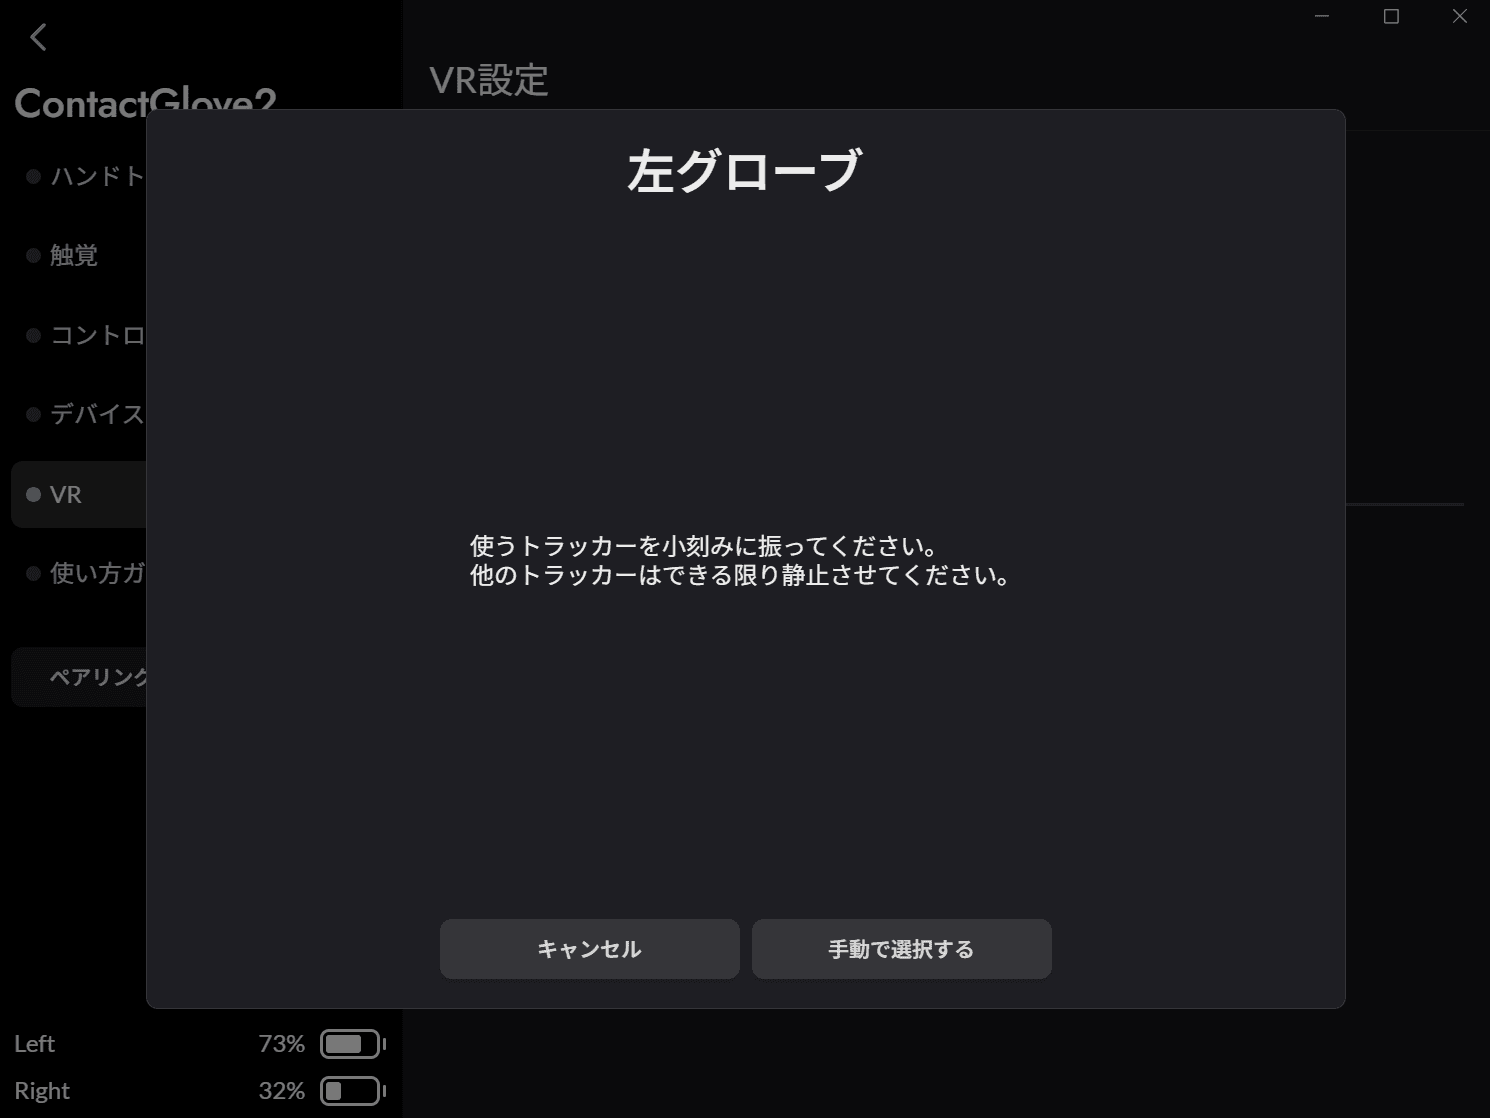 | Shake only the tracker you wish to assign to identify and assign it to the glove. If this doesn't work, press the Select Manually button. |
| 3 | 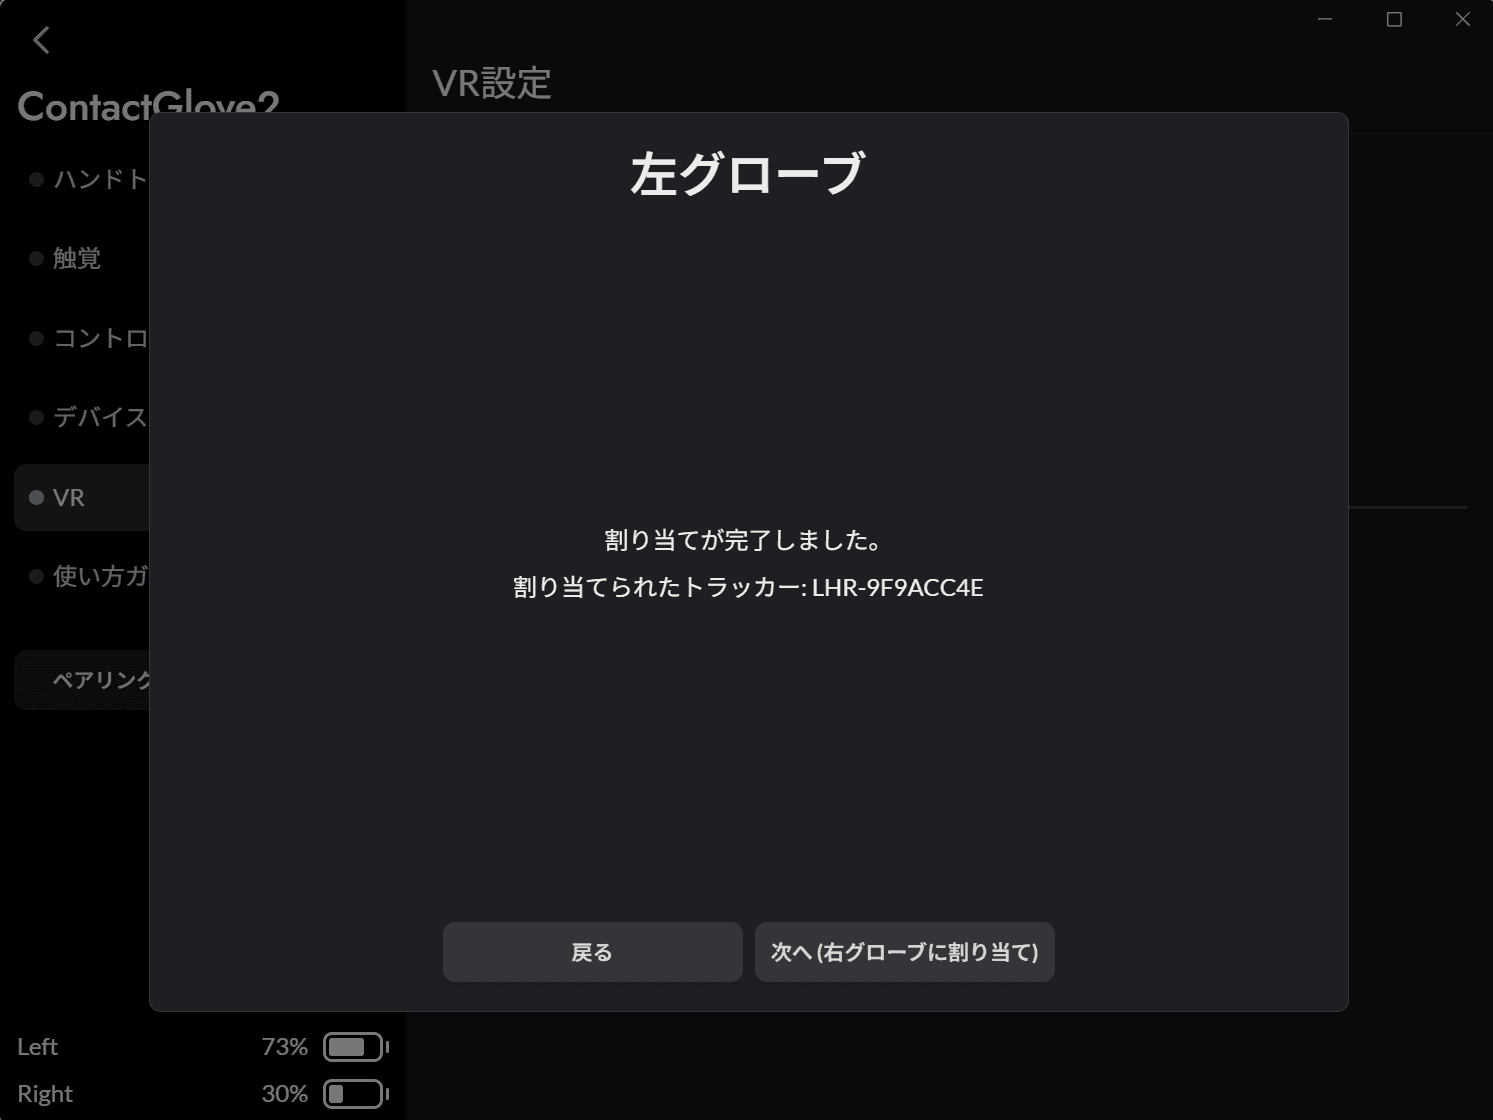 | Once successful, the next screen appears. Pressing "Next" starts the assignment phase for the other glove. |
| 4 | 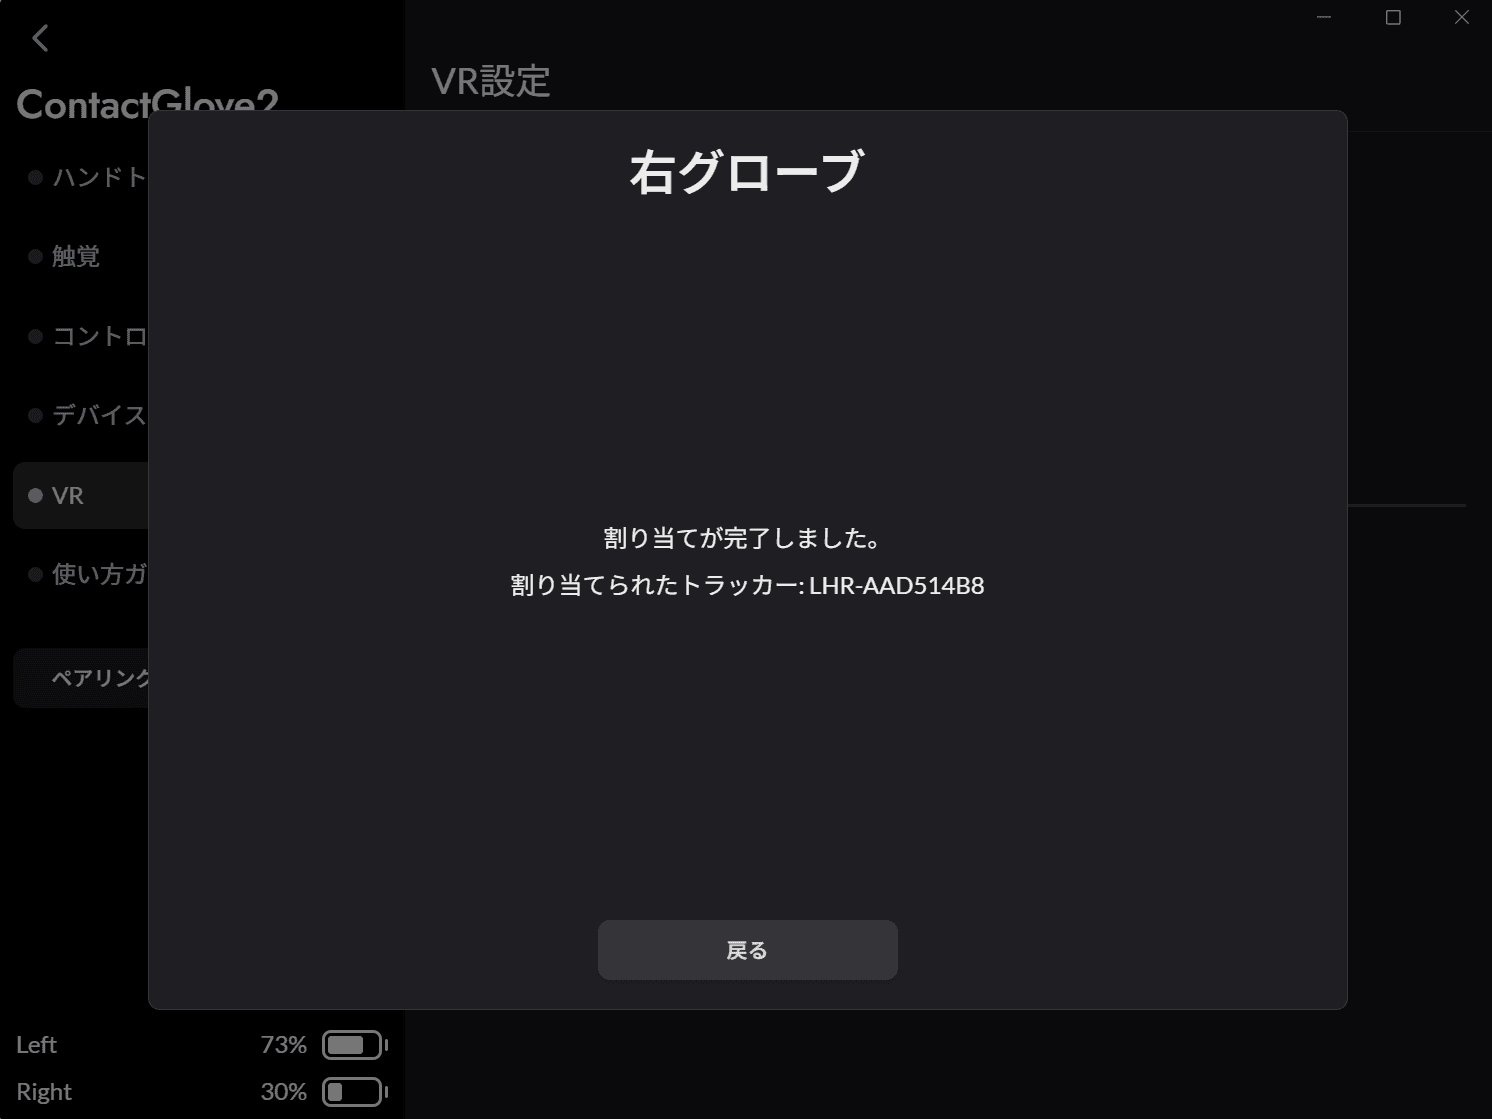 | Perform assignment for the other side in the same way. |
| *If using Quest controllers etc., you will need to configure "Adjust Hand Position" as described later. |
VR Settings: Assign Tracker | [Manual Assignment]
| Order | Image | Description |
|---|---|---|
| 1 | | Pressing the Left/Right Glove button starts the tracker assignment phase. [Assigned] : Displays tracker device serial. [Unassigned] : Displays "Unassigned". |
| 2 | | Press the Select Manually button. |
| 3 | 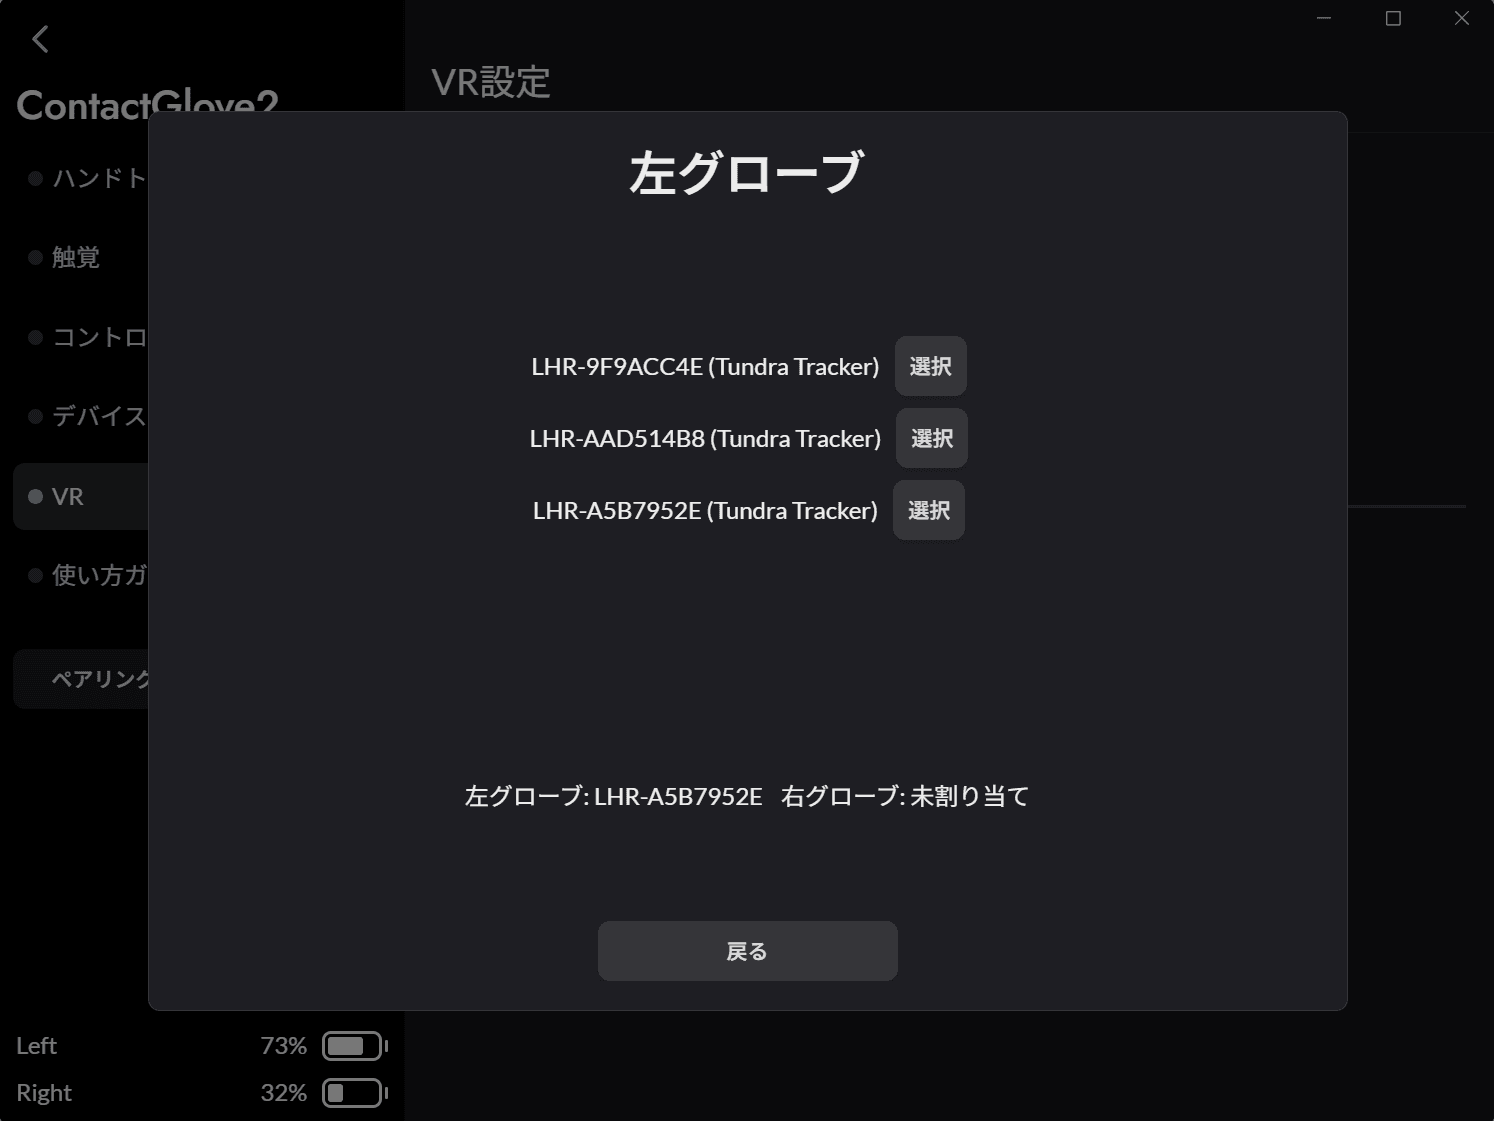 | A list of trackers currently recognized by SteamVR is displayed. Select a tracker to manually assign it to the glove. |
| 4 | | Perform assignment for the other side in the same way. |
VR Settings: Adjust Hand Position
You can adjust the position relationship (offset) of the tracker relative to the controller. There are two modes for adjustment: "Simple Adjustment (Preset Selection)" and "Detailed Adjustment (Manual Setting)".
1. Simple Adjustment (Preset Selection)
Automatically applies general position relationships simply by selecting the type of tracker used.
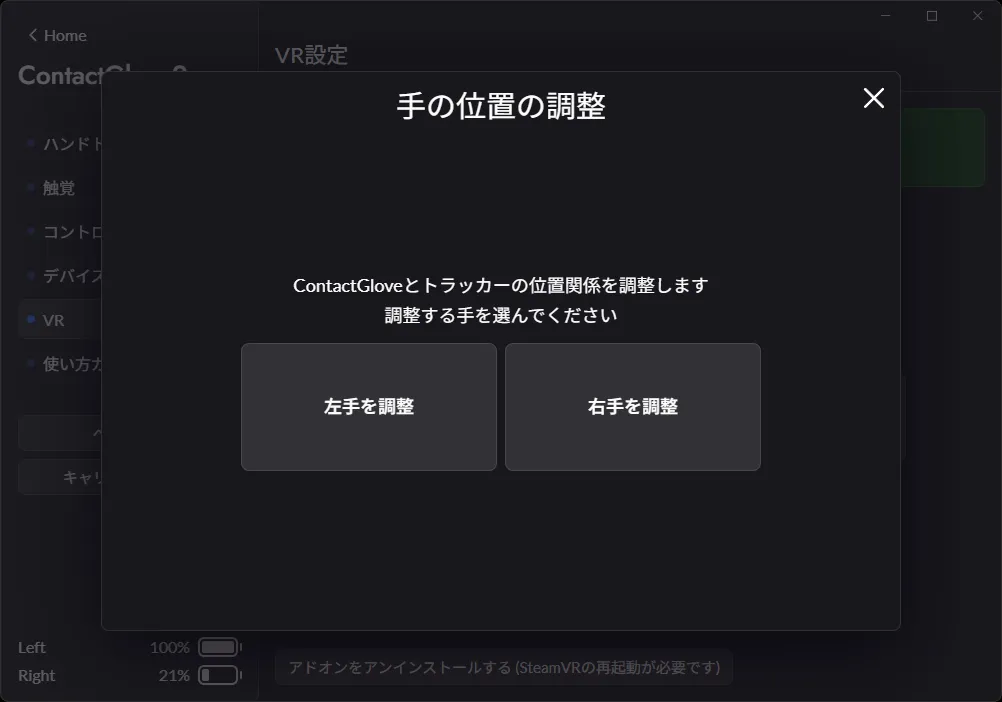
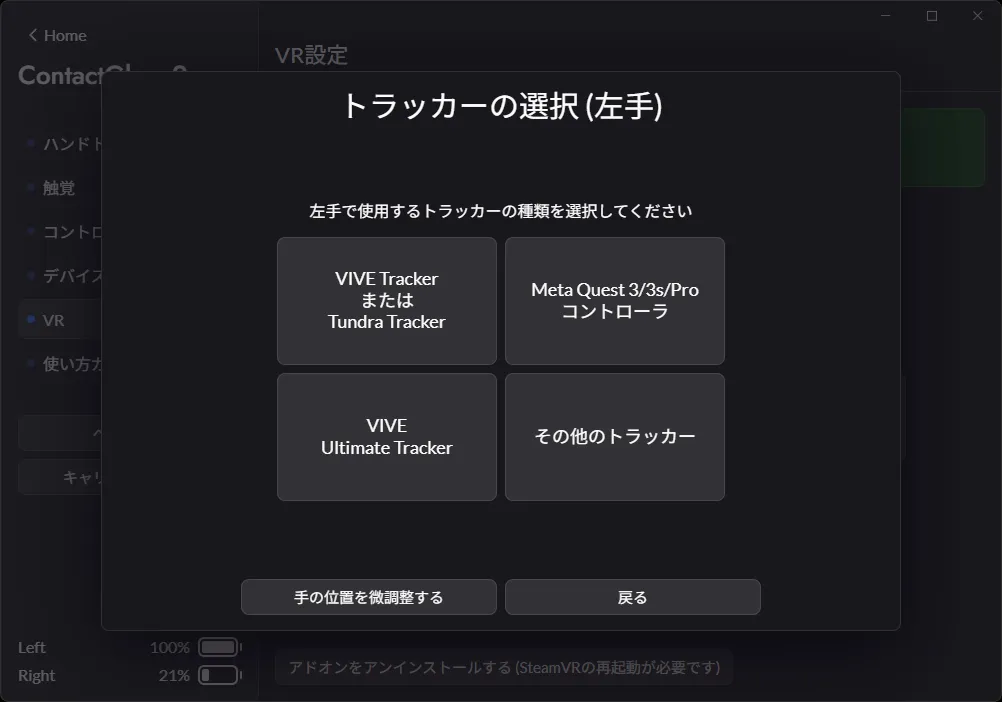
| Item | Description |
|---|---|
| VIVE Tracker or Tundra Tracker | Applies settings for those using VIVE Trackers or Tundra Trackers. |
| Meta Quest 3/3S/Pro Controller | Applies settings for those using Quest Controller Adapters. |
| VIVE Ultimate Tracker | Applies settings for those using VIVE Ultimate Trackers. |
2. Detailed Adjustment (Manual Setting)
If positions do not match using "Simple Adjustment," or if you are using a special tracker configuration, perform detailed adjustments via "Other Trackers" and "Fine-tune Position".
| Accessing Detailed Adjustment | Description |
|---|---|
| A. Other Trackers (Major adjustments) | Use when using a tracker not in the presets or when the position is significantly off. Follow the on-screen instructions to overlap the VR controller position with the real-world position to set it. 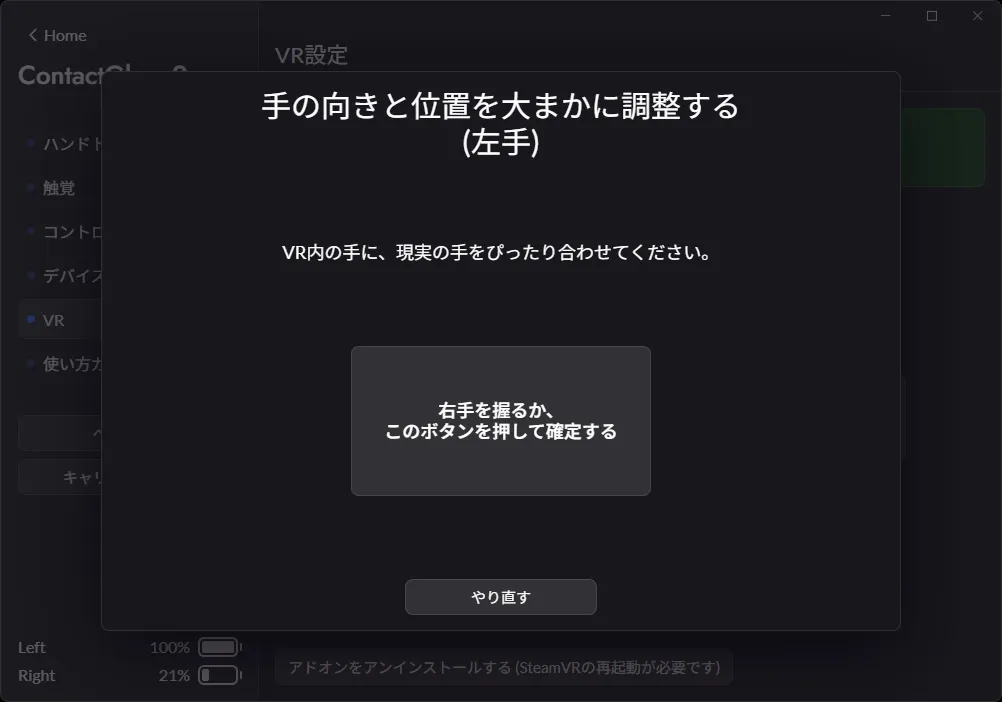 |
| B. Fine-tune Position (Millimeter adjustments) | Use to correct slight deviations after setting. Select "Fine-tune hand position" to open the detailed screen. You can adjust the position along the X, Y, and Z axes in 5 mm increments. 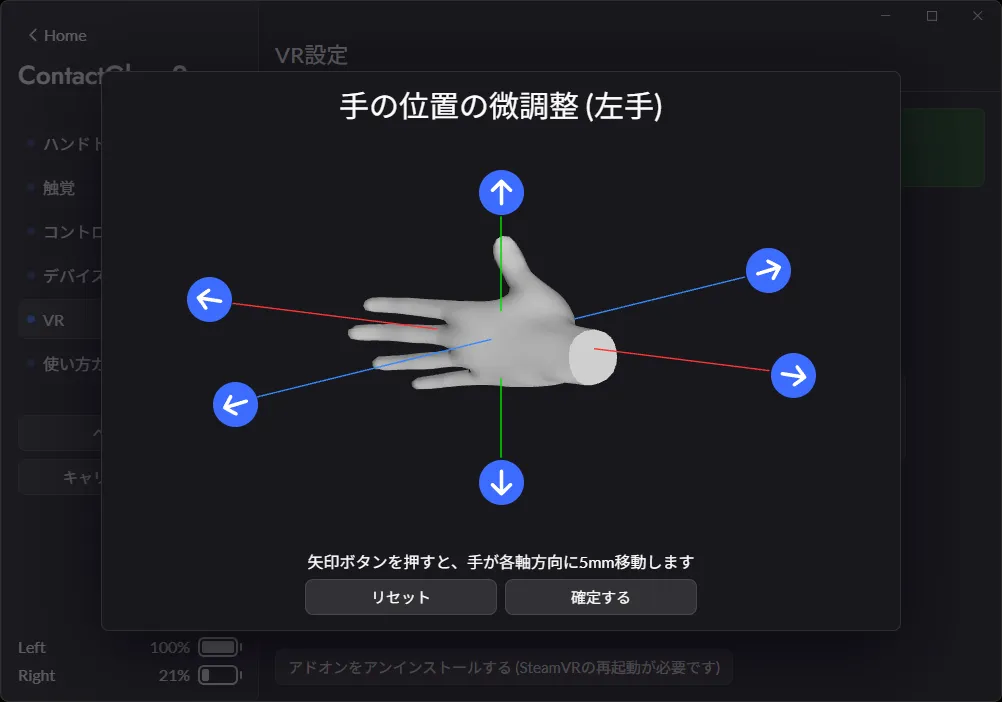 |
VR Settings: Adjust Hand Position | [Other Trackers]
| Order | Image | Description |
|---|---|---|
| 1 | | Select Other Trackers. |
| 2 | | The VR controller will become stationary in VR space. Align the physical controller position perfectly with it and press the button to confirm. |
| 3 | 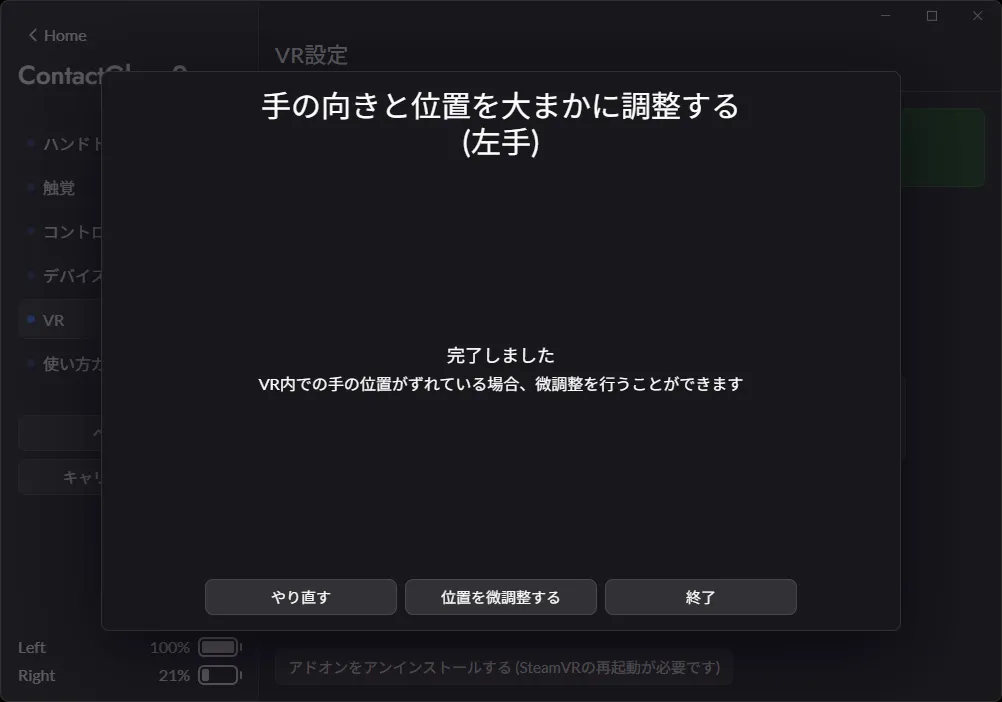 | Tracker position adjustment is complete. You can further adjust translation using Fine-tune Position. |
VR Settings: Adjust Hand Position | [Fine-tune Position]
| Order | Image | Description |
|---|---|---|
| 1 | | Select Fine-tune hand position. |
| 2 | | You can fine-tune the tracker position by ±5mm in X, Y, Z directions. |
[Tab] User Guide
You can view the DivingStation User Guide via the Document link.
You can also recall the startup tutorial screen here.
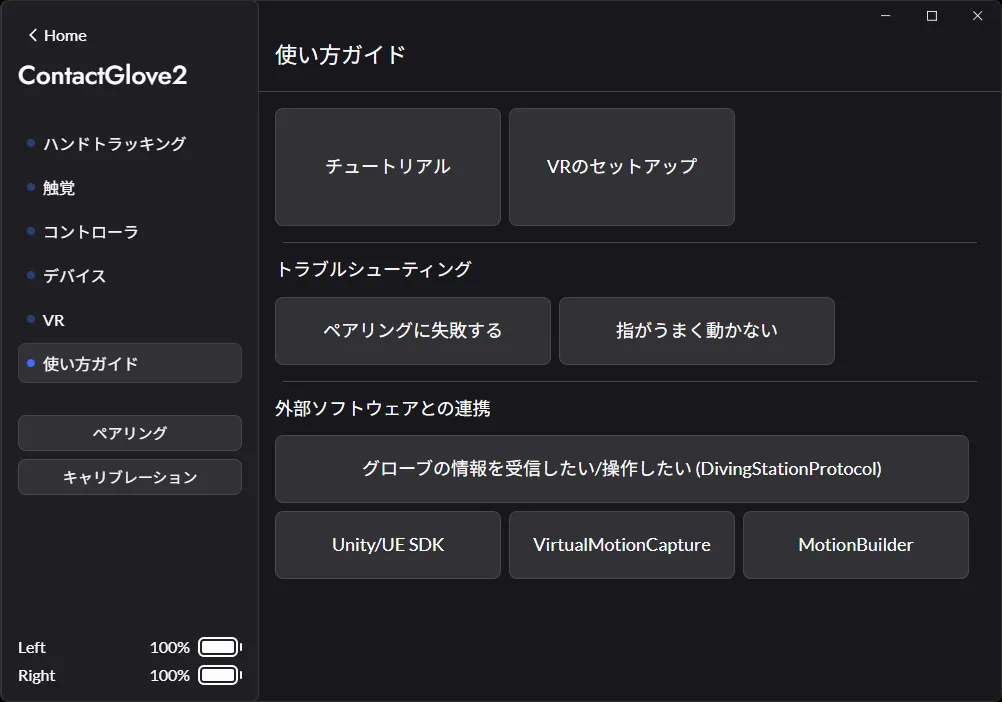
[Function List]
| No. | Function | Description |
|---|---|---|
| 1 | User Guide | Opens the tutorial regarding DivingStation usage. (Runs automatically on first launch). |
| 2 | Troubleshooting | Links to documents useful when problems occur. |
| 3 | External Software Integration | Links to documents regarding integration between DivingStation and external software. |