How to Use the SDK
On the project creation screen, select the Virtual Reality template and create a project.
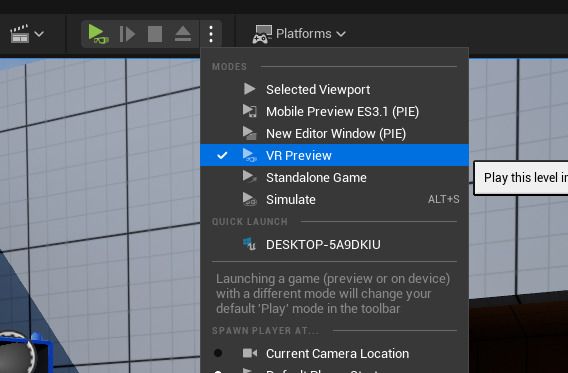
If SteamVR and DivingStation are set up correctly, running VR Preview enables hand tracking.
Accessing the ContactGlove API
To access the ContactGlove API from Blueprints, first set CGPawn in Plugins/ContactGlovePlugin/Content/Blueprints/ as the Default Pawn Class.
In Project Settings > Maps & Modes, set Default Modes > Default Pawn Class to CGPawn.
ContactGloveComponent
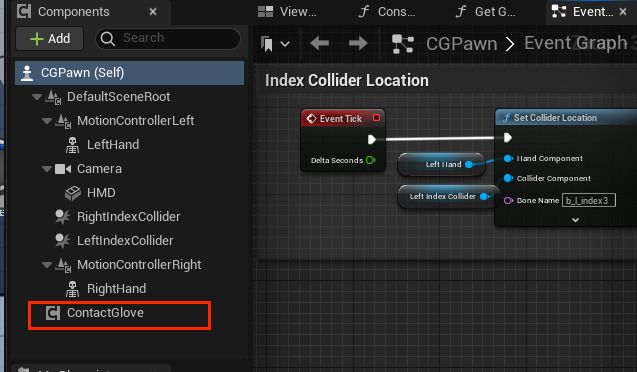
CGPawn has a ContactGloveComponent, which provides access to ContactGlove data. You can add a ContactGloveComponent using the Add button.
DevicePriority
When multiple devices are connected to DivingStation, select the device to use with ContactGloveComponent's DevicePriority. Up to six devices can be selected, from First to Sixth. Priorities are assigned automatically to device IDs received from DivingStation.
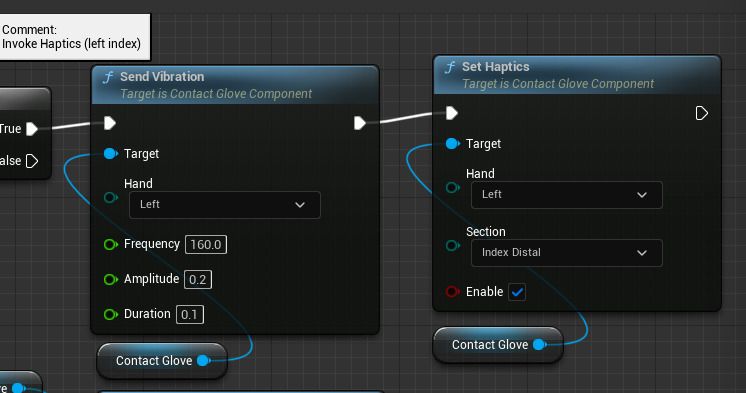
The example above uses Send Vibration to vibrate the left hand for 0.1 seconds.
The following Set Haptics node enables the haptic state for the left index finger. See Set Haptics for details of its behavior.
Set Haptics is available only on models with haptic modules sold to business customers. For standard models, use Send Vibration.
Events
ContactGloveComponent includes events triggered when data arrives from DivingStation or button input changes.
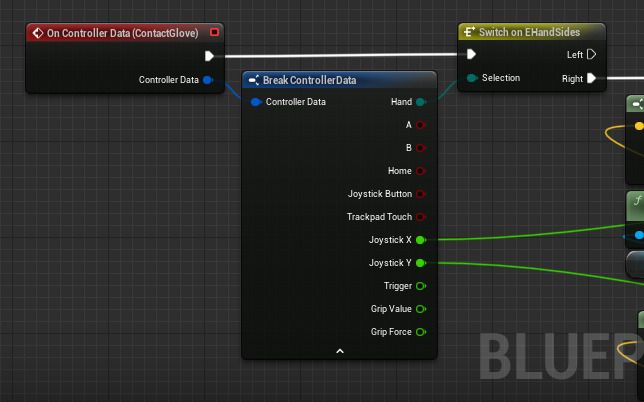
OnControllerData is called when controller information changes. It passes an FControllerInput structure containing the controller information. Use Break Controller Input to extract the values you need.
Animation
Hand visualization is handled by CGPawn > {Left, Right}Hand > SkeletalMeshComponent > Hand_{L, R}_Skeleton_Anim.
This class is in Plugins/ContactGlovePlugin/Content/Mesh/. Open its Animation Blueprint and then its AnimGraph:
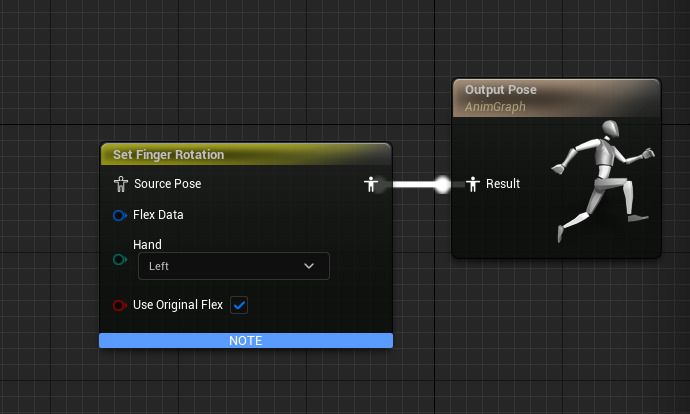
The SetFingerRotation node obtains finger flexion from DivingStation and applies it to the bones. Specify the corresponding bones and maximum rotations in Details.
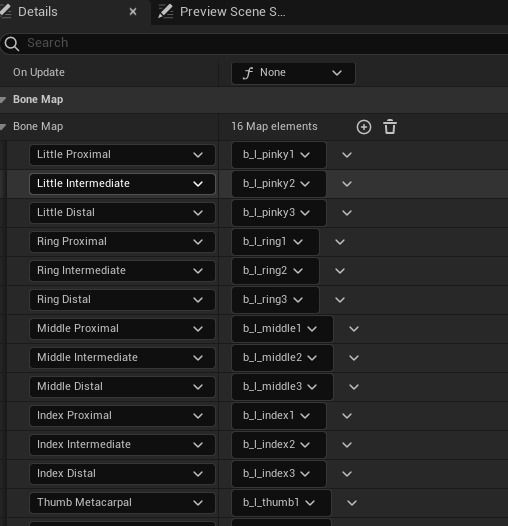
See the documentation for more details.