Setup
This guide explains how to install the SDK and check data received from DivingStation in the sample scene.
Requirements
| Item | Configuration |
|---|---|
| Unity | Unity 6.3 LTS; these steps use 6000.3.25f1 |
| Target platform | Windows, macOS 13 or later, Ubuntu 22.04/24.04 (Unity 6.3 LTS Editor system requirements) |
| Device | ContactGlove3 Pro |
| Server | DivingStation v2.0.0 or later |
| C# API compatibility | .NET Standard 2.1 |
| SDK dependencies | Unity UI 2.0, Physics, IMGUI and ImageConversion; installed by Unity when installing the SDK |
Install the SDK package
Create a new project in Unity Hub. The following steps use the Universal 3D template.
Install com.melt-interface-technologies.contactglove.sdkv2. It contains the protocol client, Unity adapters and Basic Sample. Choose one of the following methods.
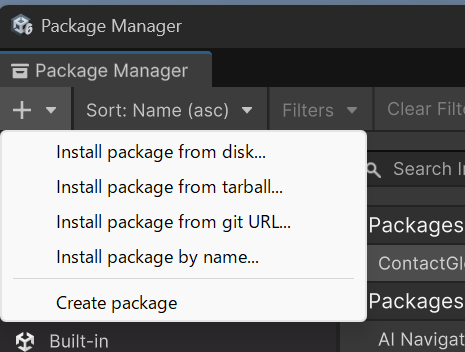
Open Window > Package Management > Package Manager. Use the + menu in the upper-left corner to choose an installation method.
From a Git URL
In Package Manager, choose + > Install package from git URL and enter the following URL. Unity must be able to run Git and access the repository.
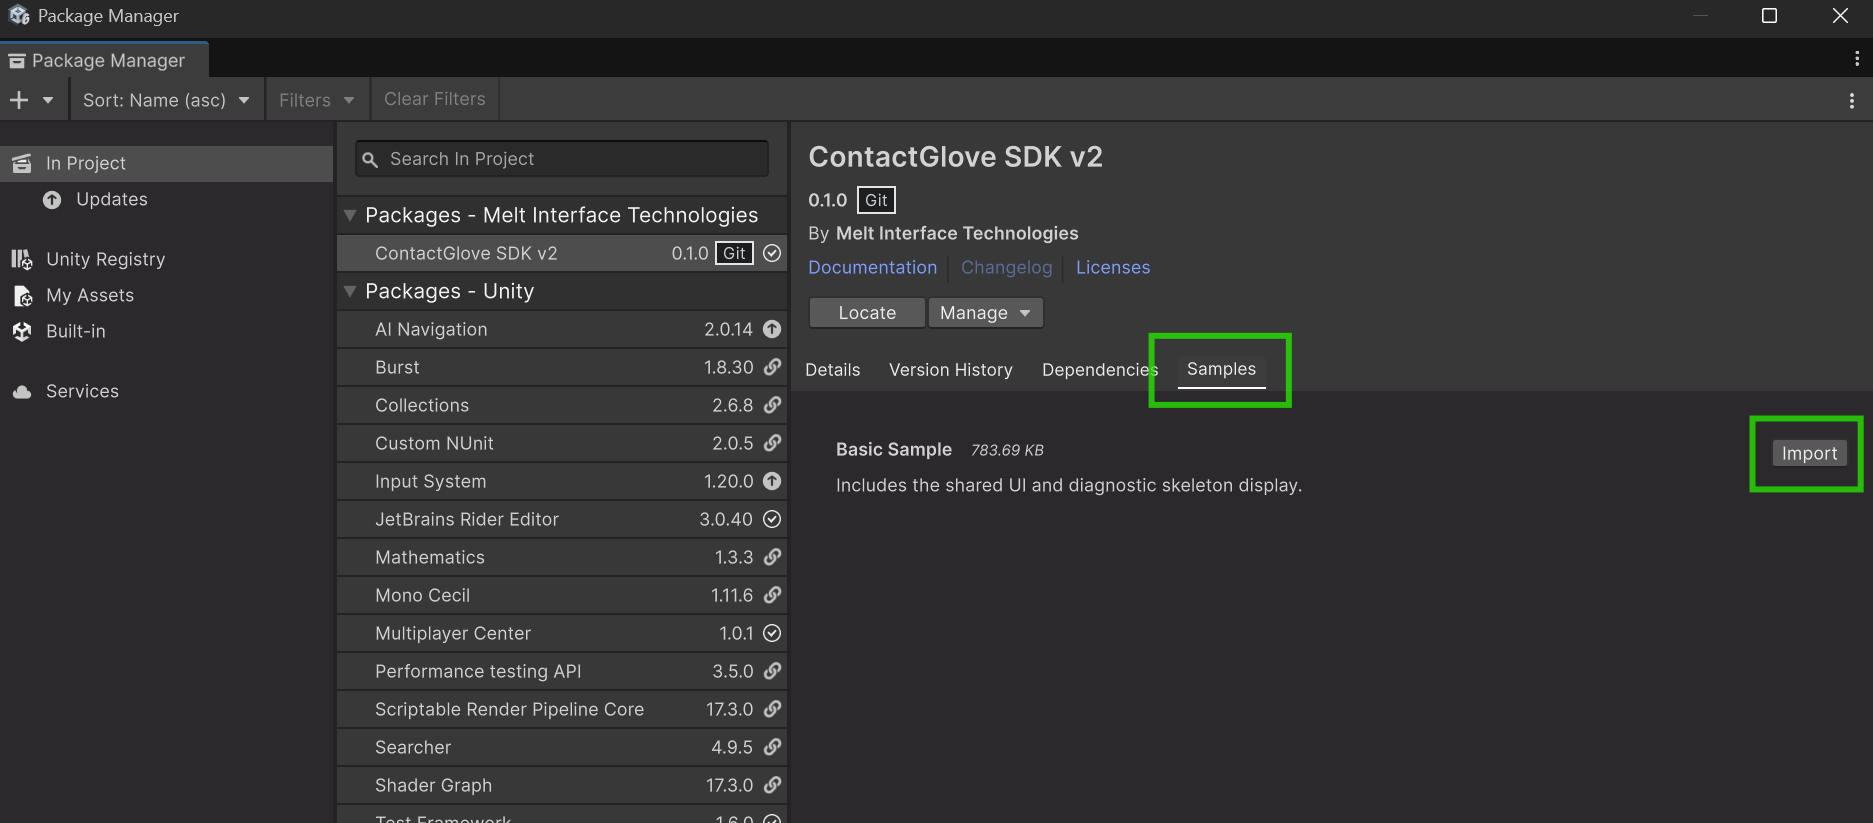
https://github.com/MeltInterfaceTechnologies/ContactGloveSDKv2Unity.git?path=/Packages/com.melt-interface-technologies.contactglove.sdkv2#mainAfter compilation, click Import under ContactGlove SDK v2 > Samples > Basic Sample. #main follows the latest commit on main. To keep using the same revision, replace it with the commit SHA or published tag you want to install. See Unity's Git package instructions and revision syntax.
From a local checkout
- Obtain ContactGloveSDKv2Unity.
- Open your Unity project and select
Window > Package Management > Package Manager. - Click
+in the upper-left corner of Package Manager and selectInstall package from disk. - Select
Packages/com.melt-interface-technologies.contactglove.sdkv2/package.jsonin the repository. Wait for package resolution and compilation to finish. - Select
ContactGlove SDK v2in the package list. On itsSamplestab, clickImportnext toBasic Sample.
Keep the repository at the same location while the Unity project references it. See Unity's disk-install instructions.
Prepare DivingStation
- Start DivingStation on the PC connected to the glove.
- Connect and enable ContactGlove3 Pro. Follow DivingStation's instructions for device setup, calibration and retarget-profile settings.
- Check that the glove works in DivingStation.
- For the initial setup, running Unity on the same PC (address
127.0.0.1) simplifies the connection settings.
Connect over a trusted LAN
- Use a trusted LAN.
- In DivingStation's
SDK / Protocol, setListening scopetoExpose on LAN. If you change the listening scope, restart DivingStation. - Set the Unity host's
IpAddressto the numeric IP address of the DivingStation PC andServerPortto its listening port (default25791). Use the same settings for an SDK application and Basic Sample. - If the connection policy requires approval, allow the connection request shown in DivingStation.
- Allow the required UDP traffic on the actual receive ports of both PCs. The SDK uses
ReceivePort; when it is0for automatic allocation, check the runtime diagnostics for the actual port.
Manage LAN access and client approval in DivingStation. Protocol sessions provide neither encryption nor cryptographic authentication, so use a trusted LAN.
Open and configure the sample
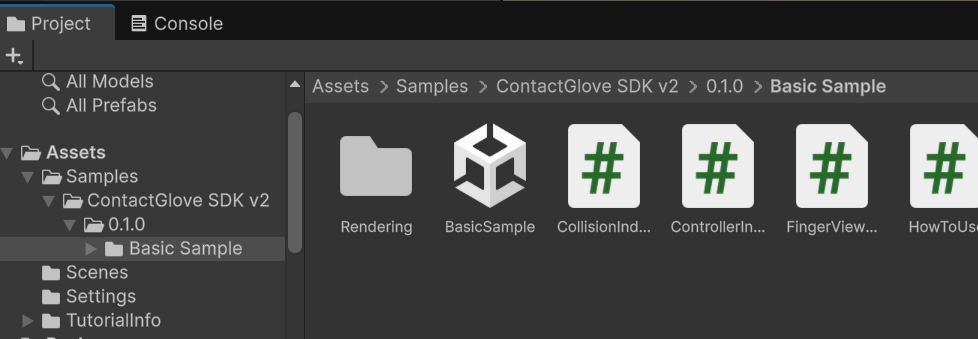
Open BasicSample.unity inside the sample imported into Assets/Samples (for example, Assets/Samples/ContactGlove SDK v2/0.1.0/Basic Sample/). The import folder may vary with the package name and version. In a URP project, the scene is marked as modified right after it opens because URP adds its settings to the light; saving it is safe.
Select the ContactGloveBehaviour GameObject in the scene. Its Hosts array contains the connection settings.
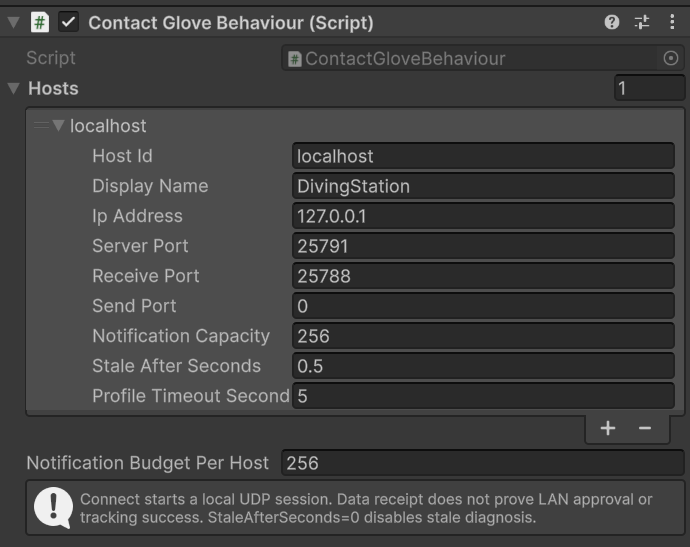
| Field | Default | Meaning |
|---|---|---|
HostId | localhost | Application-local key used to identify this server session |
DisplayName | DivingStation | Descriptive host label |
IpAddress | 127.0.0.1 | Numeric IP address of the DivingStation computer |
ServerPort | 25791 | UDP port on which DivingStation receives commands |
ReceivePort | 25788 | Local UDP data-receive port; 0 asks the OS to allocate one |
SendPort | 0 | Local UDP command-source port; 0 asks the OS to allocate one |
These are HostOptions defaults; the values serialized in a scene or changed in your project take precedence. If you change HostId, also set HowToUse.HostId on the HowToUse GameObject to the same host ID. Several clients on one computer need non-conflicting bound ports. With ReceivePort=0 or SendPort=0, inspect the actual assigned ports in the runtime diagnostics.
Set the Game view to a landscape aspect such as Free Aspect; a portrait aspect makes the UI small.
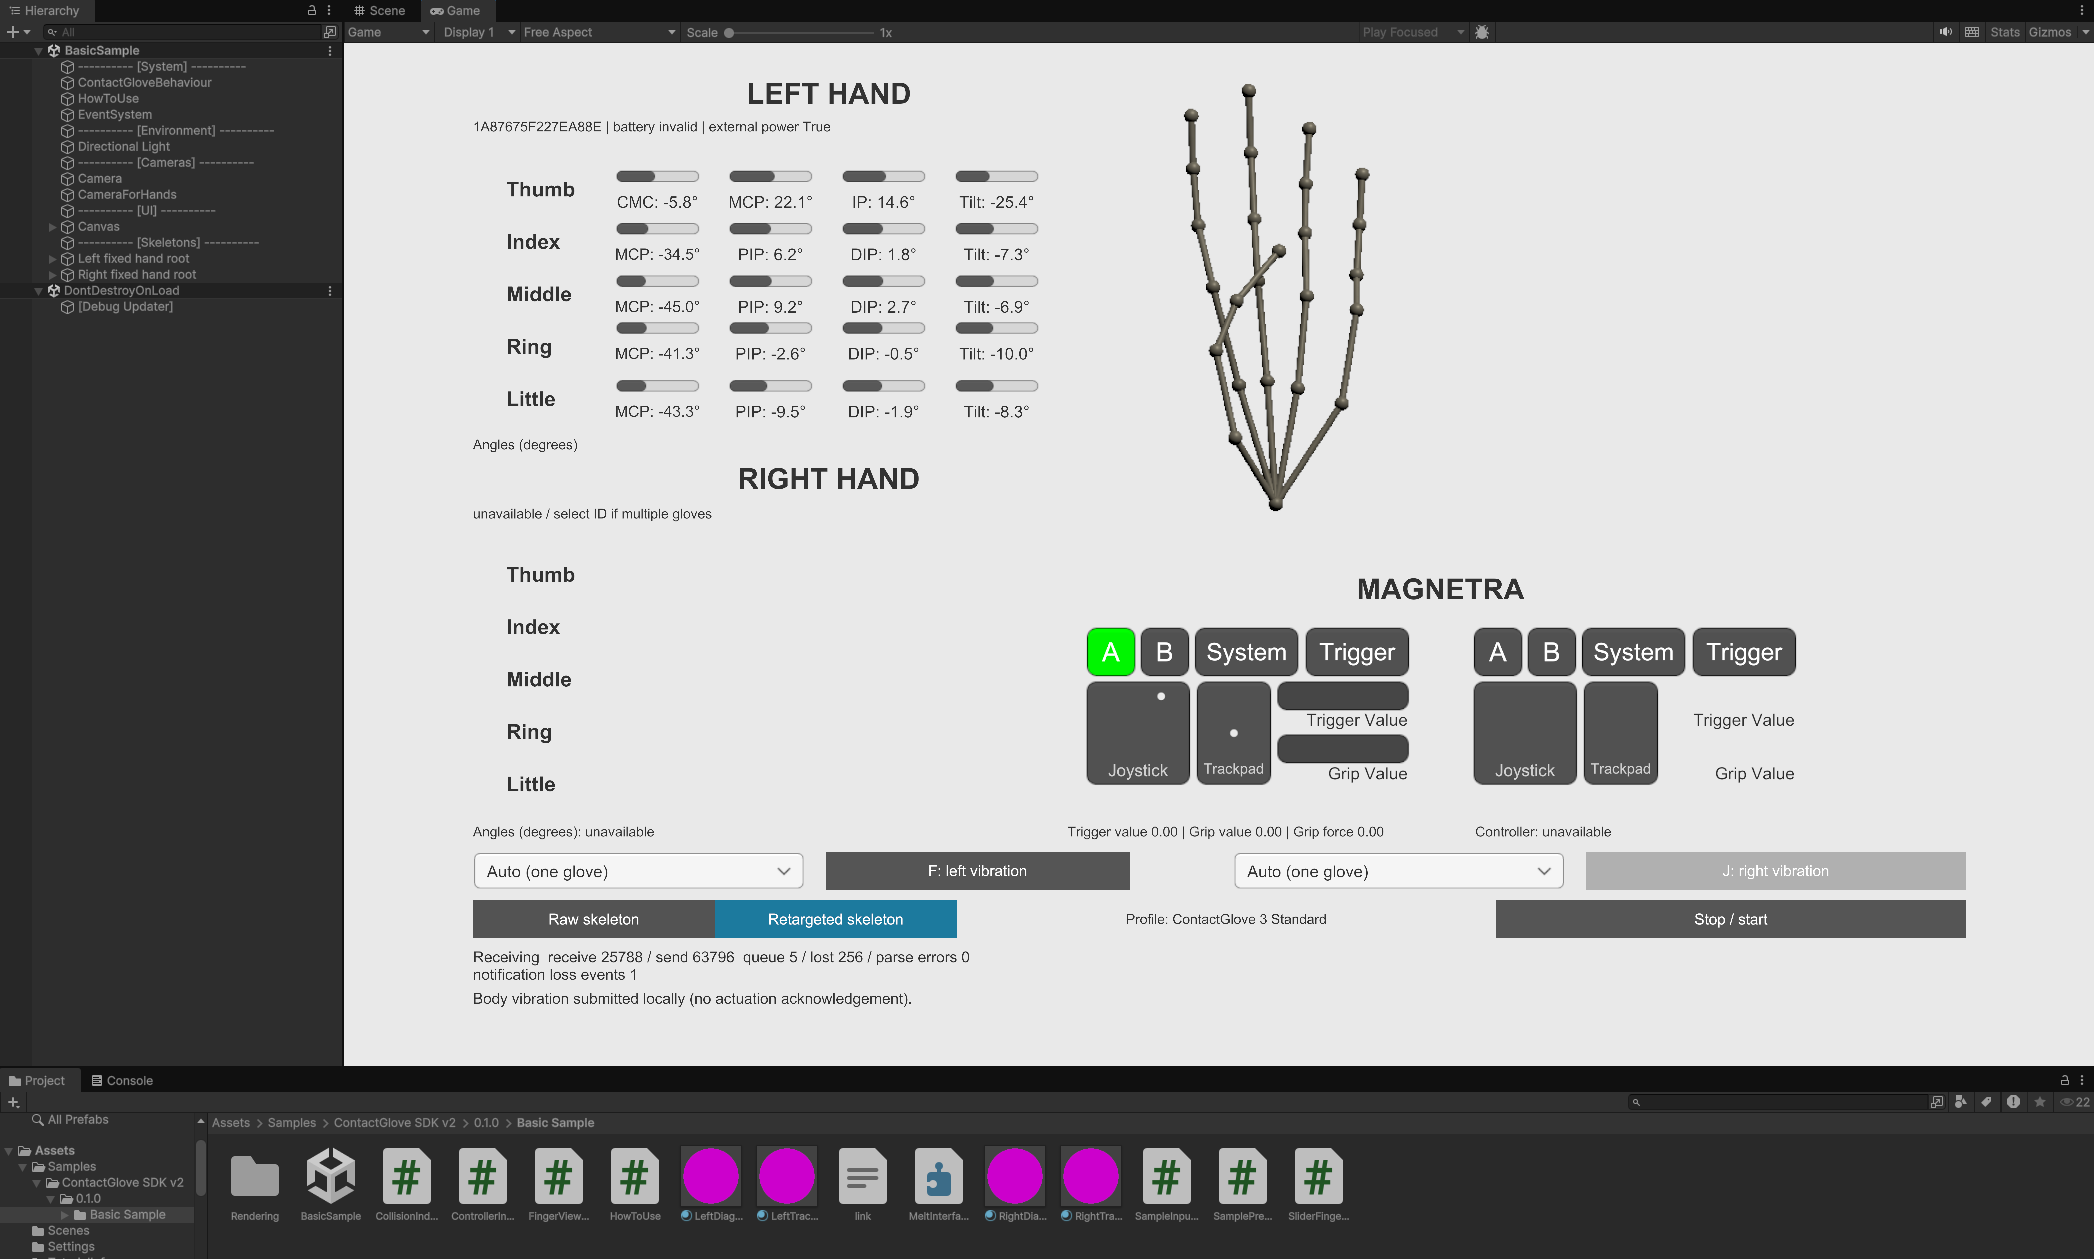
Press Play. The SDK starts a local session and the status normally begins at WaitingForData. Once accepted records arrive, diagnostics show Receiving. In DivingStation, open Settings > SDK / Protocol from the gear icon in the upper-right corner and check that SDK status under SDK / DivingStationProtocol v2 shows Active. Select one connected glove per side and verify current values as described in Usage.
VR rendering with OpenXR and XR Hands
ContactGlove3 Pro can send hand shapes to SteamVR for VR use. This section explains how to visualize those hand shapes and the positions of assigned positional trackers in Unity.
Use Unity's official HandVisualizer scene for this example. It is separate from the SDK's Basic Sample.
Windows package versions
These steps use the following versions.
| Item | Version |
|---|---|
| Unity | 6000.3.25f1 |
OpenXR Plugin (com.unity.xr.openxr) | 1.17.1 |
XR Hands (com.unity.xr.hands) | 1.8.1 |
Input System (com.unity.inputsystem) | 1.20.0 |
Use the official VR Template
In Unity Hub's new-project screen, select VR. If needed, click Download Template first. Choose a project name and location, then create the project.
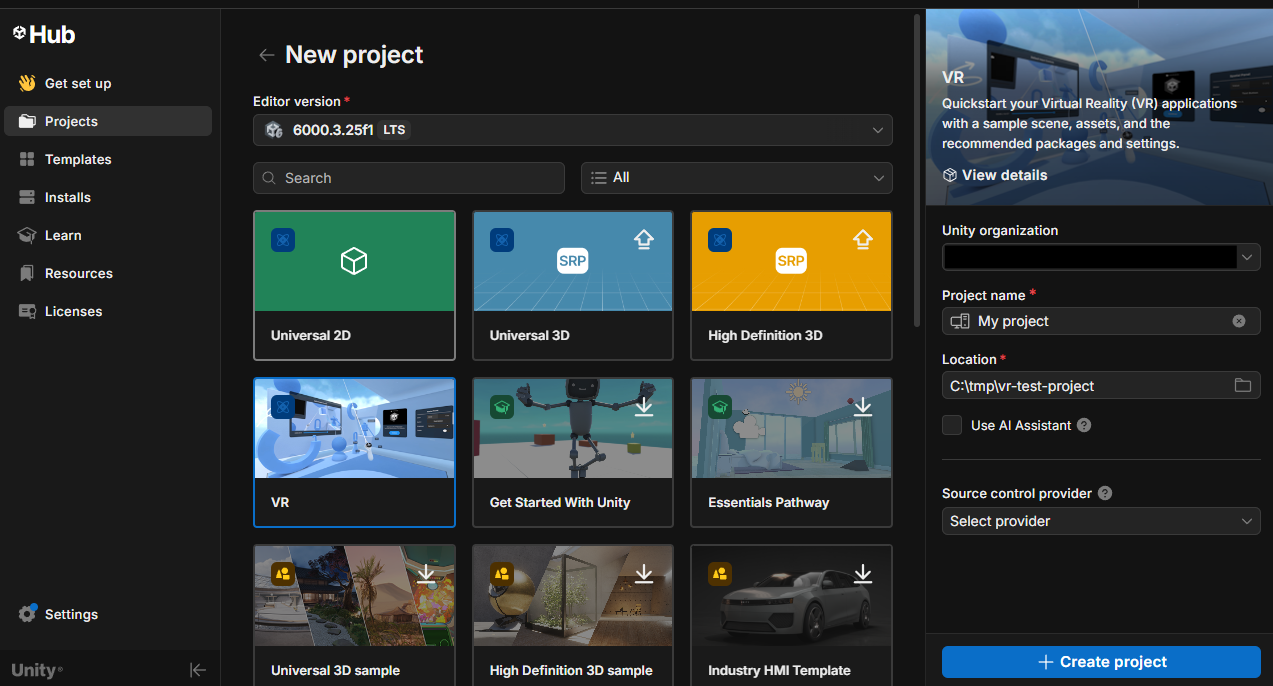
Check the automatic startup settings below.
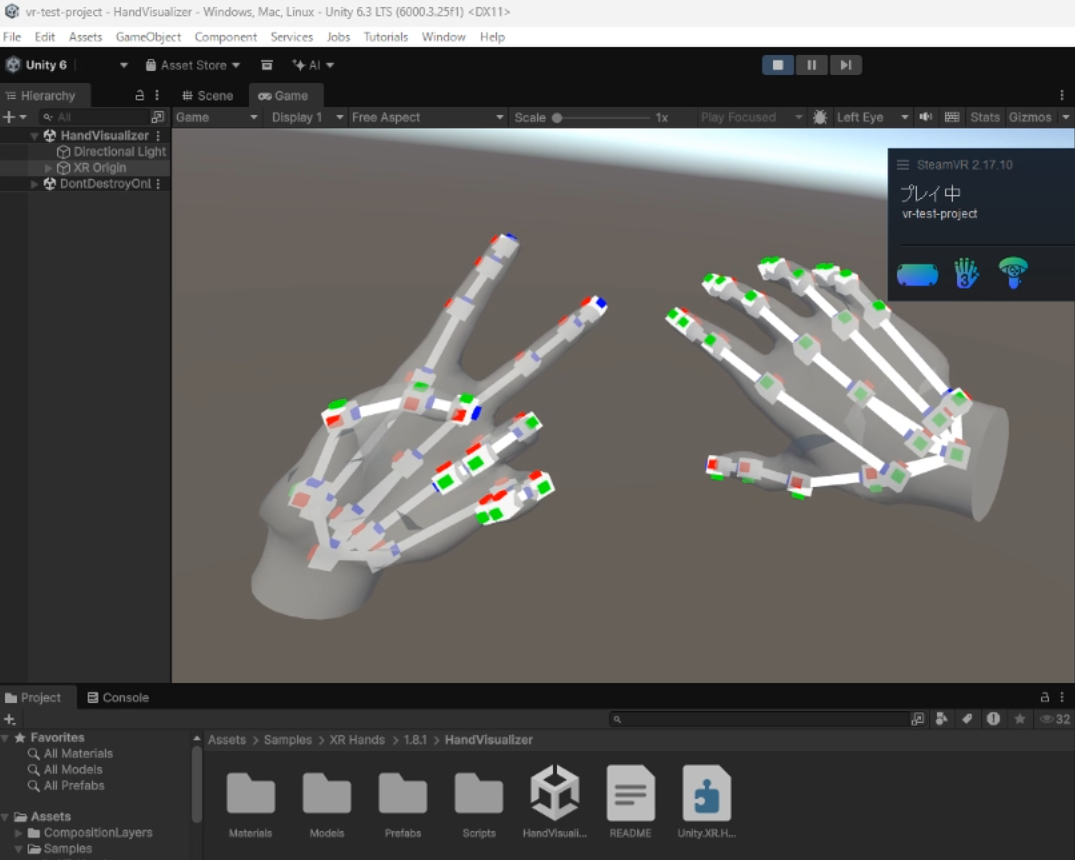
Select XR Hands in Package Manager. On its Samples tab, click Import next to HandVisualizer. If already imported, open Assets/Samples/XR Hands/1.8.1/HandVisualizer/HandVisualizer.unity. The import folder may vary with the package name and version. Continue to Run the scene.
Configure a project manually
Prepare a Windows project. We recommend Universal Render Pipeline (URP). In Package Manager, choose + > Install package by name. Enter a package ID from the table in Name, enter its version in Version, and click Install. Repeat for OpenXR Plugin, XR Hands and Input System.
Check the automatic startup settings below. Then select XR Hands > Samples > HandVisualizer in Package Manager, click Import, and open HandVisualizer.unity under Assets/Samples.
Automatic startup settings
Configure these settings under Edit > Project Settings > XR Plug-in Management. These steps start XR and hand tracking automatically when entering Play mode or launching a Player.
| Setting | Value |
|---|---|
| OpenXR loader | ON |
| Initialize XR on Startup | ON |
| Hand Tracking Subsystem | ON |
| Auto Start Subsystem | ON |
Enable OpenXR and Initialize XR on Startup. Under XR Plug-in Management > OpenXR, enable the Hand Tracking Subsystem feature. Click its gear icon and enable Auto Start Subsystem.
Applications that implement their own startup sequence can instead control XR initialization and hand-tracking startup manually.
Run the scene
Check errors under Window > XR > OpenXR > Project Validation and configure the project for your runtime and devices. For controller input, also set the appropriate Interaction Profile and input bindings.
Set SteamVR as the OpenXR runtime. Prepare DivingStation, ContactGlove3 Pro, the HMD and positional trackers, and ensure SteamVR tracks them correctly. To receive hand joints, the runtime must expose hand data through XR_EXT_hand_tracking.
Press Play in HandVisualizer. In the HMD, check both hands' shapes, orientation and movement. If hands are missing, follow OpenXR troubleshooting.